Hi, there. I’m going to use an email message from my friend Ben to show you how to organize your Gmail inbox a little better.
First order of business: never delete messages. We’re going to archive them instead. This is the equivalent of taking every piece of physical mail that’s ever been sent to your house and putting it in your basement instead of throwing the mail you don’t need or don’t care about away. If you do this in real life, you’re crazy. If you don’t do this online, you’re crazy.
There are three buttons above every message: one that looks like a box (Archive), then an exclamation point inside a stop sign (Report spam), then a trash can (Delete). Unless you’re running really low on Google storage space (you probably aren’t), always use Archive when you’re done reading a message that you’d like to file away and retrieve later (or never).
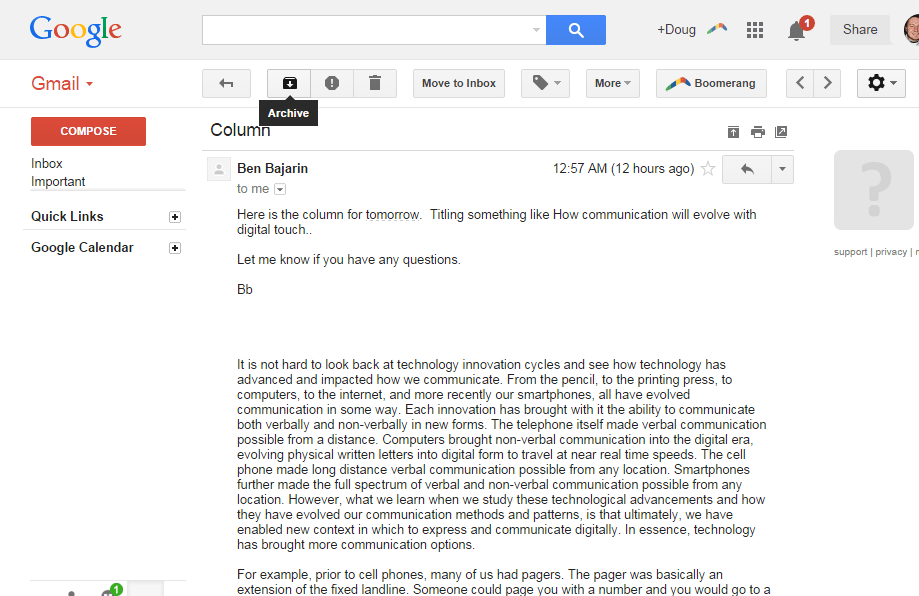
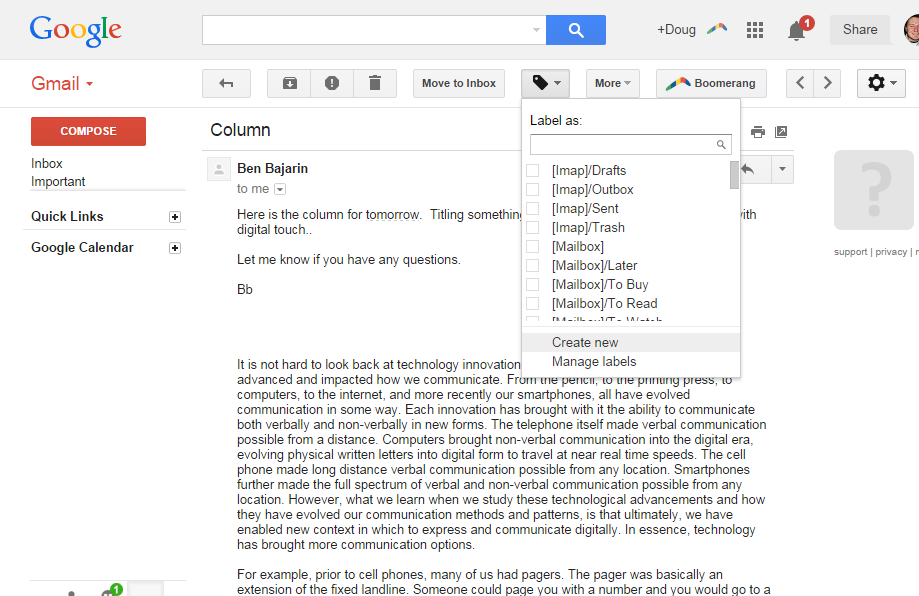
Now, I need a place to file this message away. I’m going to create a label for it. Click the label-looking thing up at the top of the message and choose “Create new” to — you guessed it — create a new label.
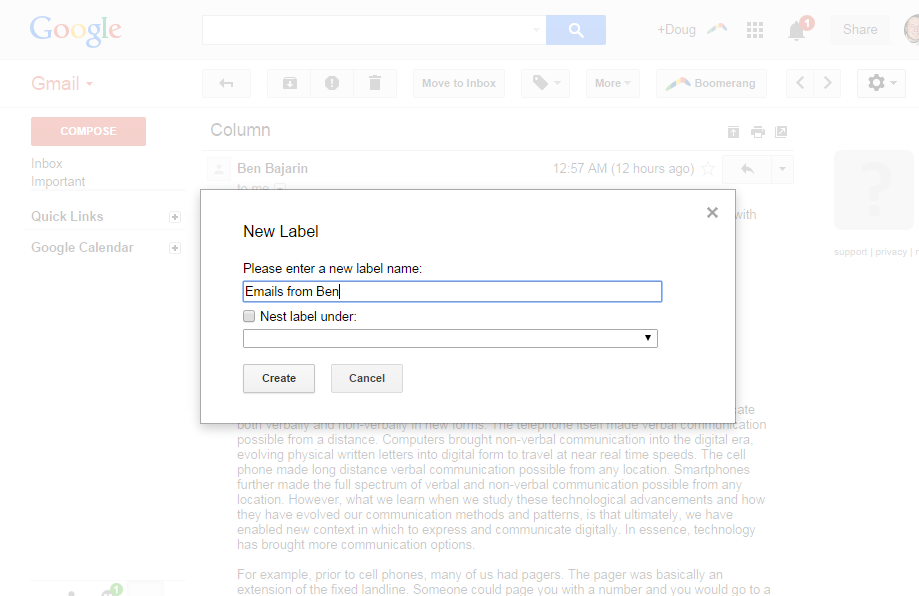
I’m going to call this label “Emails from Ben” since it will contain emails from Ben.
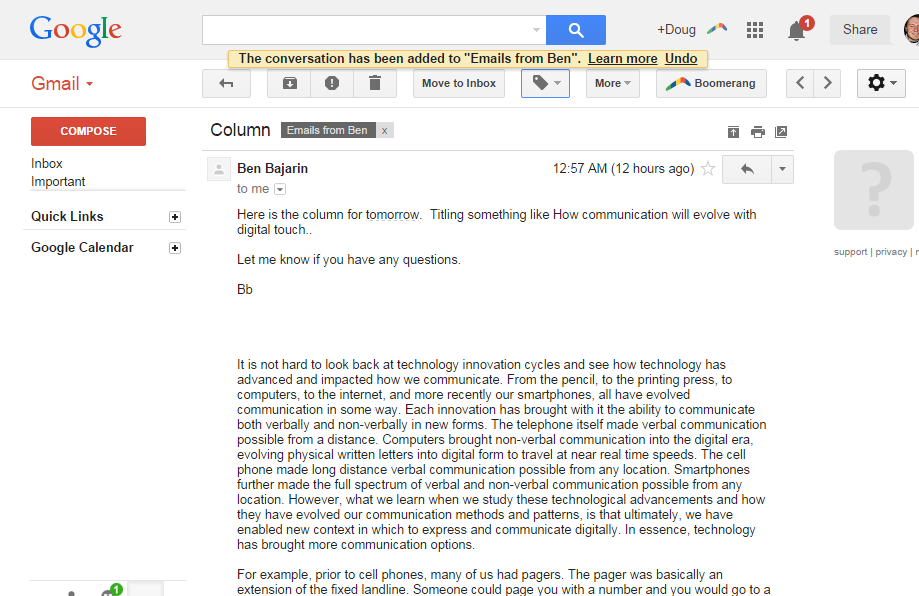
Now that the label has been created, you’ll notice a little link that says “Emails from Ben” next to the subject of the email message. Clicking that label will take me to a list of all the emails I’ve labeled as “Emails from Ben.” There will only be one email on that list right now, though. Oh, and I can add multiple labels to each message if I like. If Ben were a member of my family (he’s not) and he emailed me about some bill that needed paying, I could label that message “Emails from Ben” and “Household” if I wanted to. That’s for the advanced class, though.
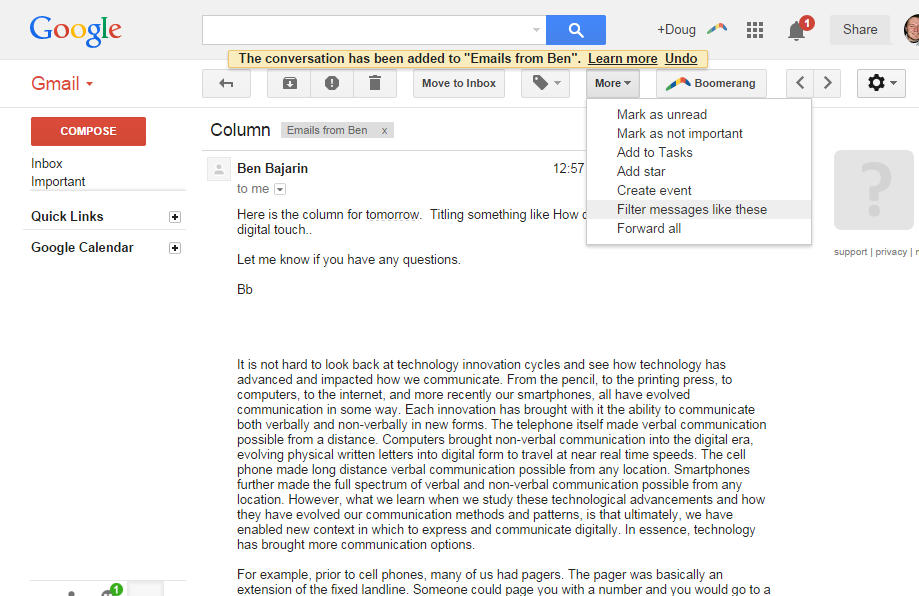
Now, I could just manually label every email from Ben under “Emails from Ben” but I’m a busy, important, handsome man who doesn’t have time for that nonsense. Let’s automate this process. Under the More button, I’ll choose “Filter messages like these” to create a filter.
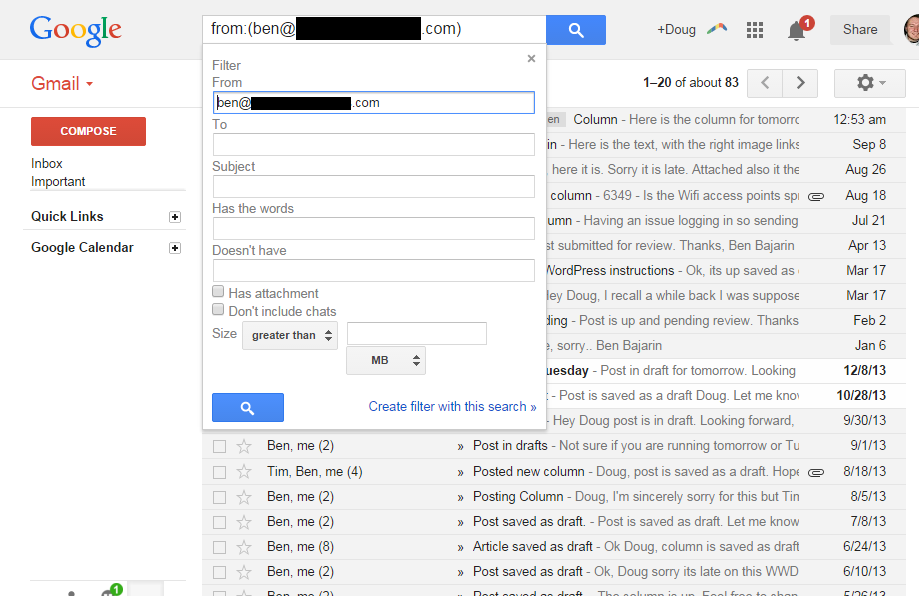
Here is where you’ll need to be wearing elastic-leg undergarments if you tend to get too excited by technology. I’ll create a filter that does something (I’ll denote the “something” next) every time I get an email from Ben. This filter will work off of his email address, but I could set different parameters or additional parameters. That’s also for the advanced class. For this go-around, we’ll stick to Ben’s email address. Click “Create filter with this search” to move on.
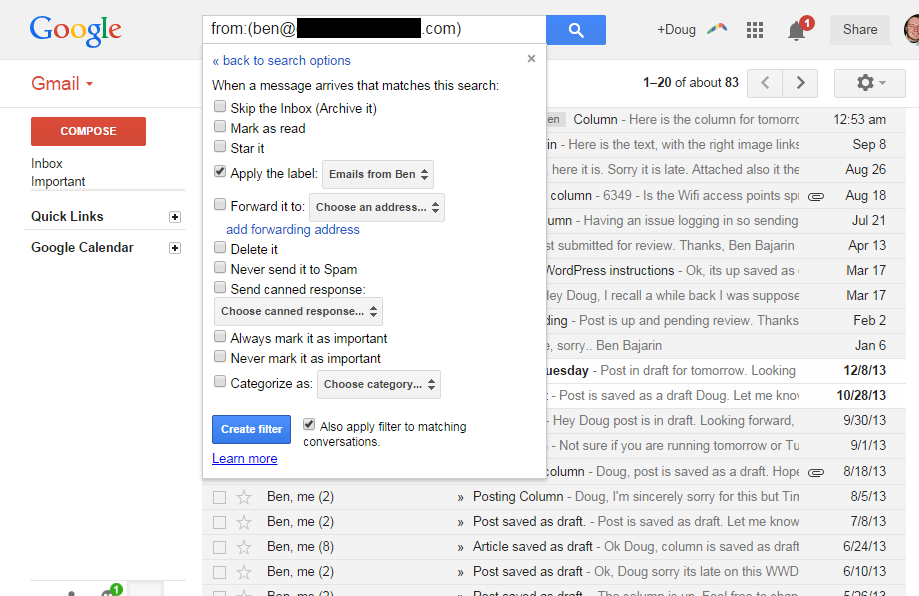
As you can see, I have a lot of options here. Every time I get an email from Ben, I can archive it immediately, mark it as read, star it, and a bunch of other fun stuff. I’m going to choose to “Apply the label” and choose the “Emails from Ben” label we made a few steps earlier. And since I want all past emails from Ben to get categorized under the “Emails from Ben” label (but I don’t want to label them all by hand), I’m going to choose the “Also apply filter to matching conversations” checkbox at the bottom before clicking the “Create filter” button.
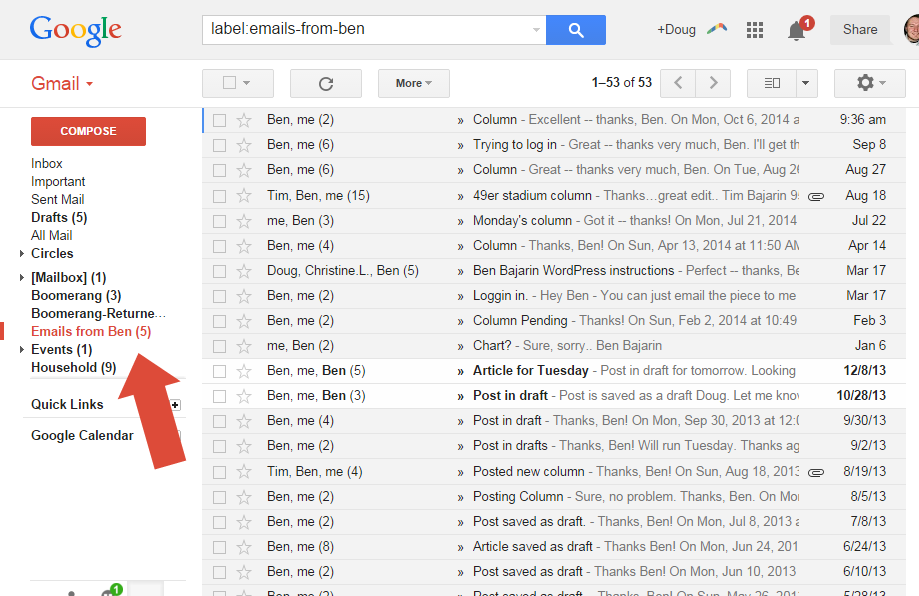
Now every email that Ben has sent me from that particular email address should show up under the “Emails from Ben” label that’s accessible from the left-hand column. And every email I get from him in the future will automatically get the “Emails from Ben” label applied to it automatically. When I’m done reading a message from him, I’ll archive it and know where to quickly find it later.
“Well, that was stupid,” you’re saying. Maybe so, but this sorcery can be applied to a whole bunch of other stuff.
Let’s say, for instance, that I want to sign up for a website that requires an email address but I don’t want to give this website my real address. I can add a “+” to my Gmail username between my name and the “@” to create a Gmail alias. I can then filter messages sent to “doug+spam@gmail.com” to either skip my inbox altogether and/or to get automatic labels applied to them.
Here’s a quick video of the process in action:
In essence, learning how to work with labels and filters allows you to create several automated traffic cops that can sling your email around as you see fit. Once you’ve tweaked everything a bit, you’ll notice a cleaner inbox despite spending less time dealing with email.
More Must-Reads from TIME
- Cybersecurity Experts Are Sounding the Alarm on DOGE
- Meet the 2025 Women of the Year
- The Harsh Truth About Disability Inclusion
- Why Do More Young Adults Have Cancer?
- Colman Domingo Leads With Radical Love
- How to Get Better at Doing Things Alone
- Michelle Zauner Stares Down the Darkness
Contact us at letters@time.com