There’s nothing like that new phone feeling. One minute, you’re marveling over your slab of plastic and metal, and the next, you’re panicking over how much work you’ll have to do to set it up and figure out how to use it.
The experience doesn’t have to be so painful, however. If you just bought a new Android phone like the Samsung Galaxy S5 or HTC One (M8), this 10-step process will leave you with a clean, easy-to-use and fully-functional phone, without any clutter or annoyances.
Step 1: Skip the Setup Junk
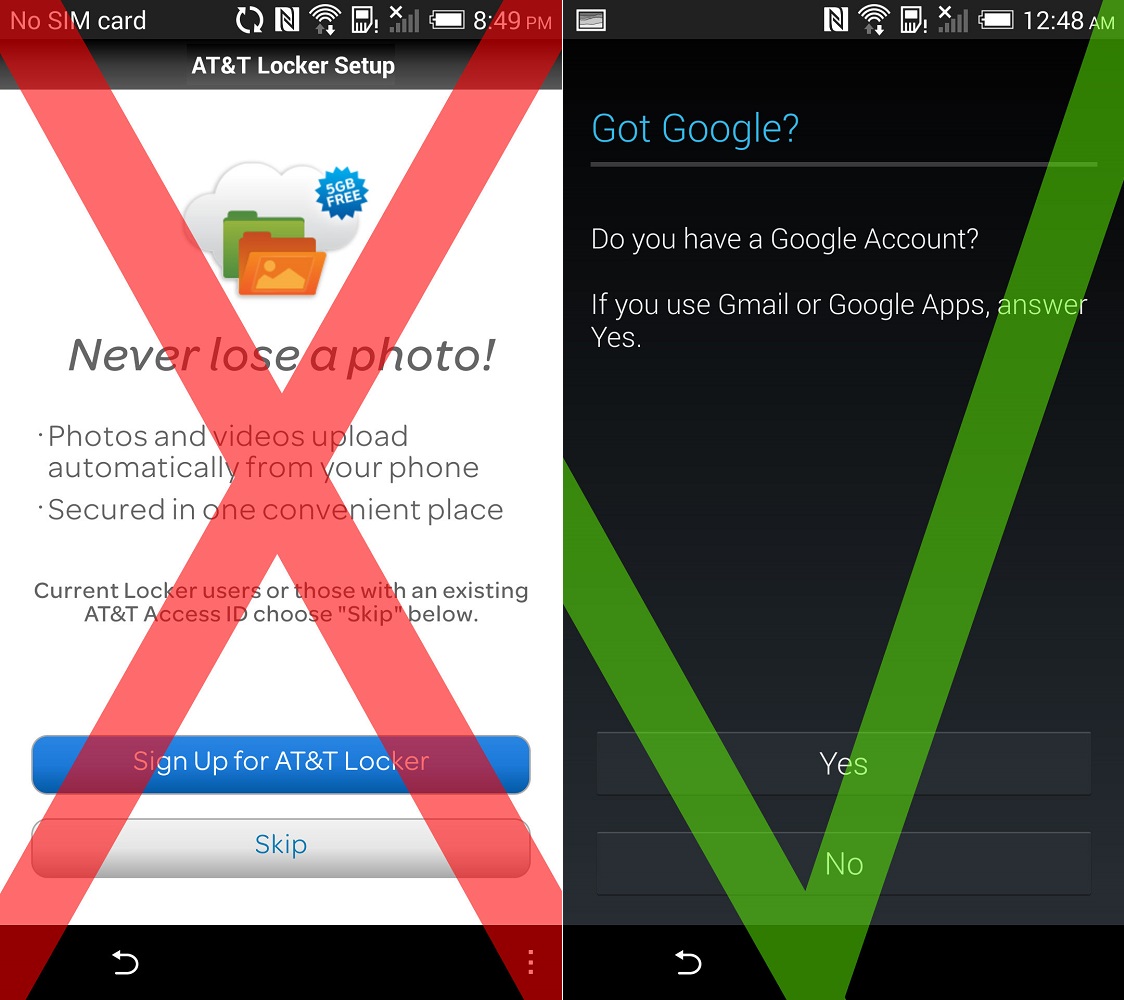
If you buy an Android phone from a major wireless carrier, chances are the setup process is a minefield of sign-ins for services you don’t need. Should you have a Samsung account? Maybe, just to claim this handful of freebies, but it’s not essential. Do you need cloud storage from AT&T or Verizon? Definitely not.
The only thing you should absolutely do during the setup process is plug in your Google account credentials, as this will let you download apps and connect you with multiple useful Google services at the same time.
Step 2: Wipe the Slate Clean
See all those apps and widgets that are cluttering up your home screen already? Get rid of them all and start from scratch. On many phones (including Samsung’s Galaxy S series), you can do this easily by pinching on the home screen. You’ll get a zoomed-out view of all your home screen pages, from which you can create a blank home screen and drag the old, cluttered ones into the trash.
Don’t worry; you won’t actually delete any apps this way. Everything’s still available through the app tray, which appears as a little grid icon at the bottom of each home screen. From there, you can add just the apps and widgets you really need. We’ll get rid of the rest in the next step.
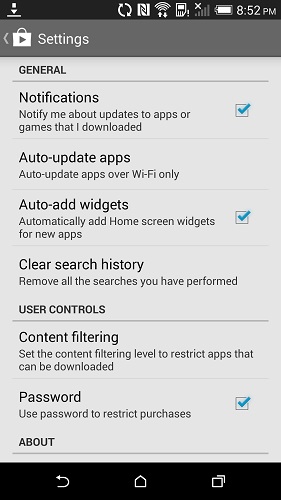
Step 3: Remove the Bloatware
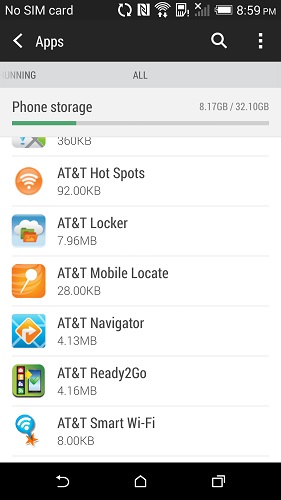
The unpleasant reality of Android phones is that they tend to come with a lot of unwanted junk. To remove the clutter, head to your phone’s settings menu, then to the “Apps” or “Applications” section, and find the subsection titled “All.”
This section is a bit confusing, because it includes not just standalone apps, but core system functions, and you don’t want to remove any of the latter. As a general rule, an app is safe to remove if it also appears in your app tray (see step 2). Go through this list and remove anything you don’t want. Some apps can’t be removed entirely, but can still be disabled.
Don’t freak out if you see a warning about removing or disabling built-in apps. Again, as long as it’s an actual app that appears in the app tray, you should be able to get rid of it without problems.
Step 4: Tweak Your Gmail settings

The Android version of Gmail is great, but you may not like some of its default settings. Open the app, and look for the three dots in the top-right corner (or press your phone’s menu button) and hit “Settings.” Tap on your e-mail address and tap on “Inbox sound & vibrate.” If you get too many e-mails, like I do, you’ll definitely want to hit “Sound” and select “Silent” so your phone isn’t constantly blurting out noises.
Now, back out to the main settings menu and select “General settings.” If you’d rather delete e-mails than archive them, hit “Archive & delete actions” and hit “Show delete only.” Now, you can delete e-mails just by swiping to the right. You’ll also see a delete button when viewing e-mails in the notification bar.
Step 5: Set Photo Backups to Unlimited
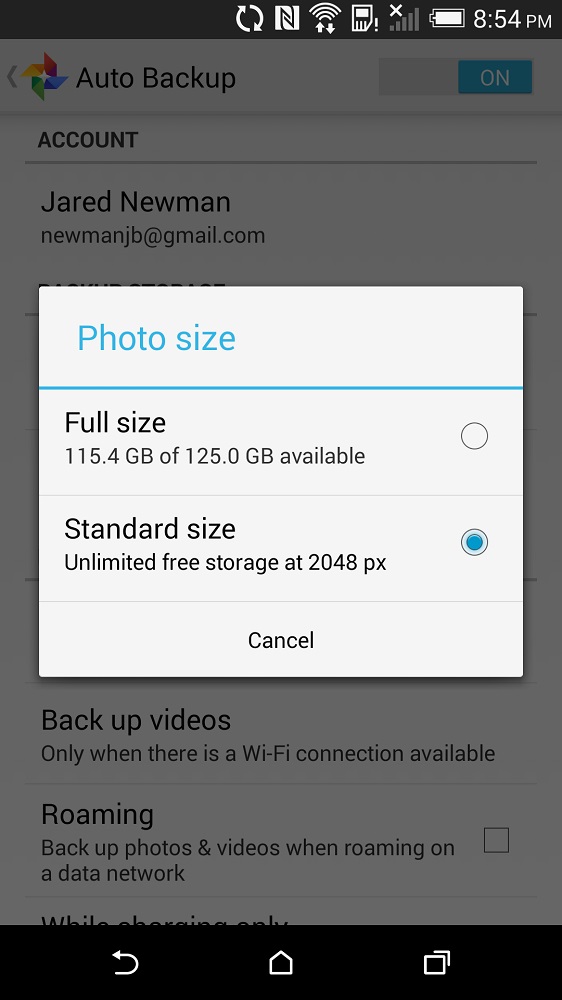
Many new Android phones include an app called Google+ Photos, which can automatically back up any photo or video you take on your phone. It’s a must-have app for keeping your memories safe, and you can get it as part of the main Google+ app if you don’t have it already.
There’s just one problem: By default, Google+ Photos backs up everything at full resolution. This counts against your 15 GB Google storage limit and could eventually keep you from getting e-mail unless you pay for more storage. To fix this, go to the app’s Settings menu, hit Auto Backup and set Photo size to “Standard.” Now, you can upload unlimited photos, capped at a resolution of 2048 pixels wide. That’s still good enough to view on any screen.
Step 6: Check Your Google Play Store Settings
You just spent all that time cleaning up your home screen in Step 2; now you have to make sure your new apps don’t crash the party.
Open Google Play Store, swipe to the right, hit “Settings,” and uncheck the box that says “Add icon to Home screen.” Your new apps will be available in the app tray, which appears as a little grid icon at the bottom of each home screen.
You may also want to disable notifications for app updates from the same menu.
Step 7: Set Up Android Device Manager
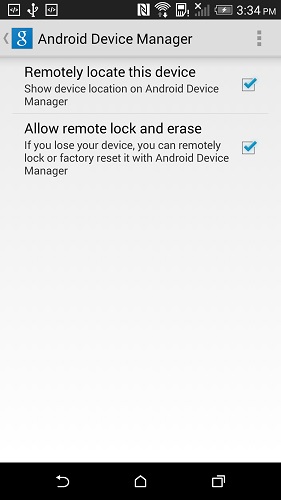
Device Manager is the Android equivalent of Apple’s “Find My iPhone,” allowing you to locate, wipe or lock a lost or stolen phone. To check on your settings, open the Google Settings app (separate from your phone’s main Settings app), and go to “Android Device Manager.” From here, you can decide which remote management features you’d like to enable. Once you’ve set it up, bookmark the Android Device Manager website for easy access later.
Step 8: Get Some Apps
This one’s obvious, but you’ll probably want some new Android apps to go with your new Android phone. Here are 50 of our favorites.
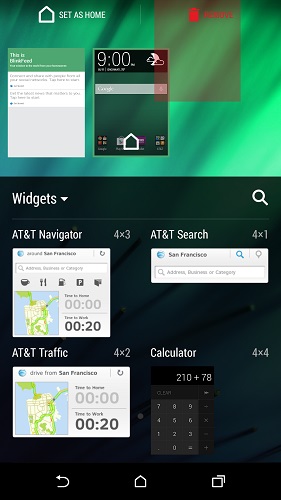
Step 9: Tastefully Place Some Widgets
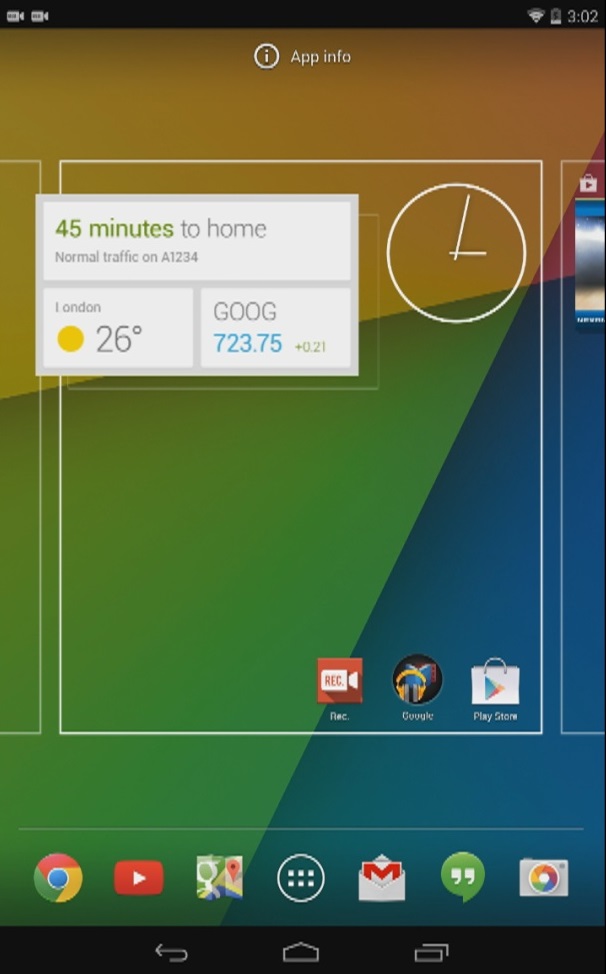
Widgets are one of the best features of Android, allowing you to glance at information or quickly perform an action straight from your home screen, but they’re also easy to get wrong. Some widgets are ugly, some fail to update reliably, some drain your battery, and some just aren’t that useful. Instead of larding up your phone with bad widgets, pick a handful that you really like, and put one or two on each of your home screens, organized by genre or purpose. Here are 14 of our favorites.
Step 10: Get a Handle On Notifications

Now that you’ve installed a bunch of apps, you may find that some are being obnoxious, and flooding you with unwanted notifications.
Here’s an easy way to silence the offenders: Head to your phone’s settings, and go to the “Applications” or “Apps” section. Under the “Downloaded” tab, select any app you’d rather not hear from, and uncheck the box for “Show notifications.” This will override any settings within the app itself, and it’s strangely satisfying.
This is just a starting point–a way to get your phone to look good and run smoothly. When you’re ready for more hints and tips, check out our list of essentials for Android users and seven tips every smartphone owner should know.
More Must-Reads from TIME
- Inside Elon Musk’s War on Washington
- Meet the 2025 Women of the Year
- The Harsh Truth About Disability Inclusion
- Why Do More Young Adults Have Cancer?
- Colman Domingo Leads With Radical Love
- How to Get Better at Doing Things Alone
- Cecily Strong on Goober the Clown
- Column: The Rise of America’s Broligarchy
Contact us at letters@time.com