1. Tote Bag
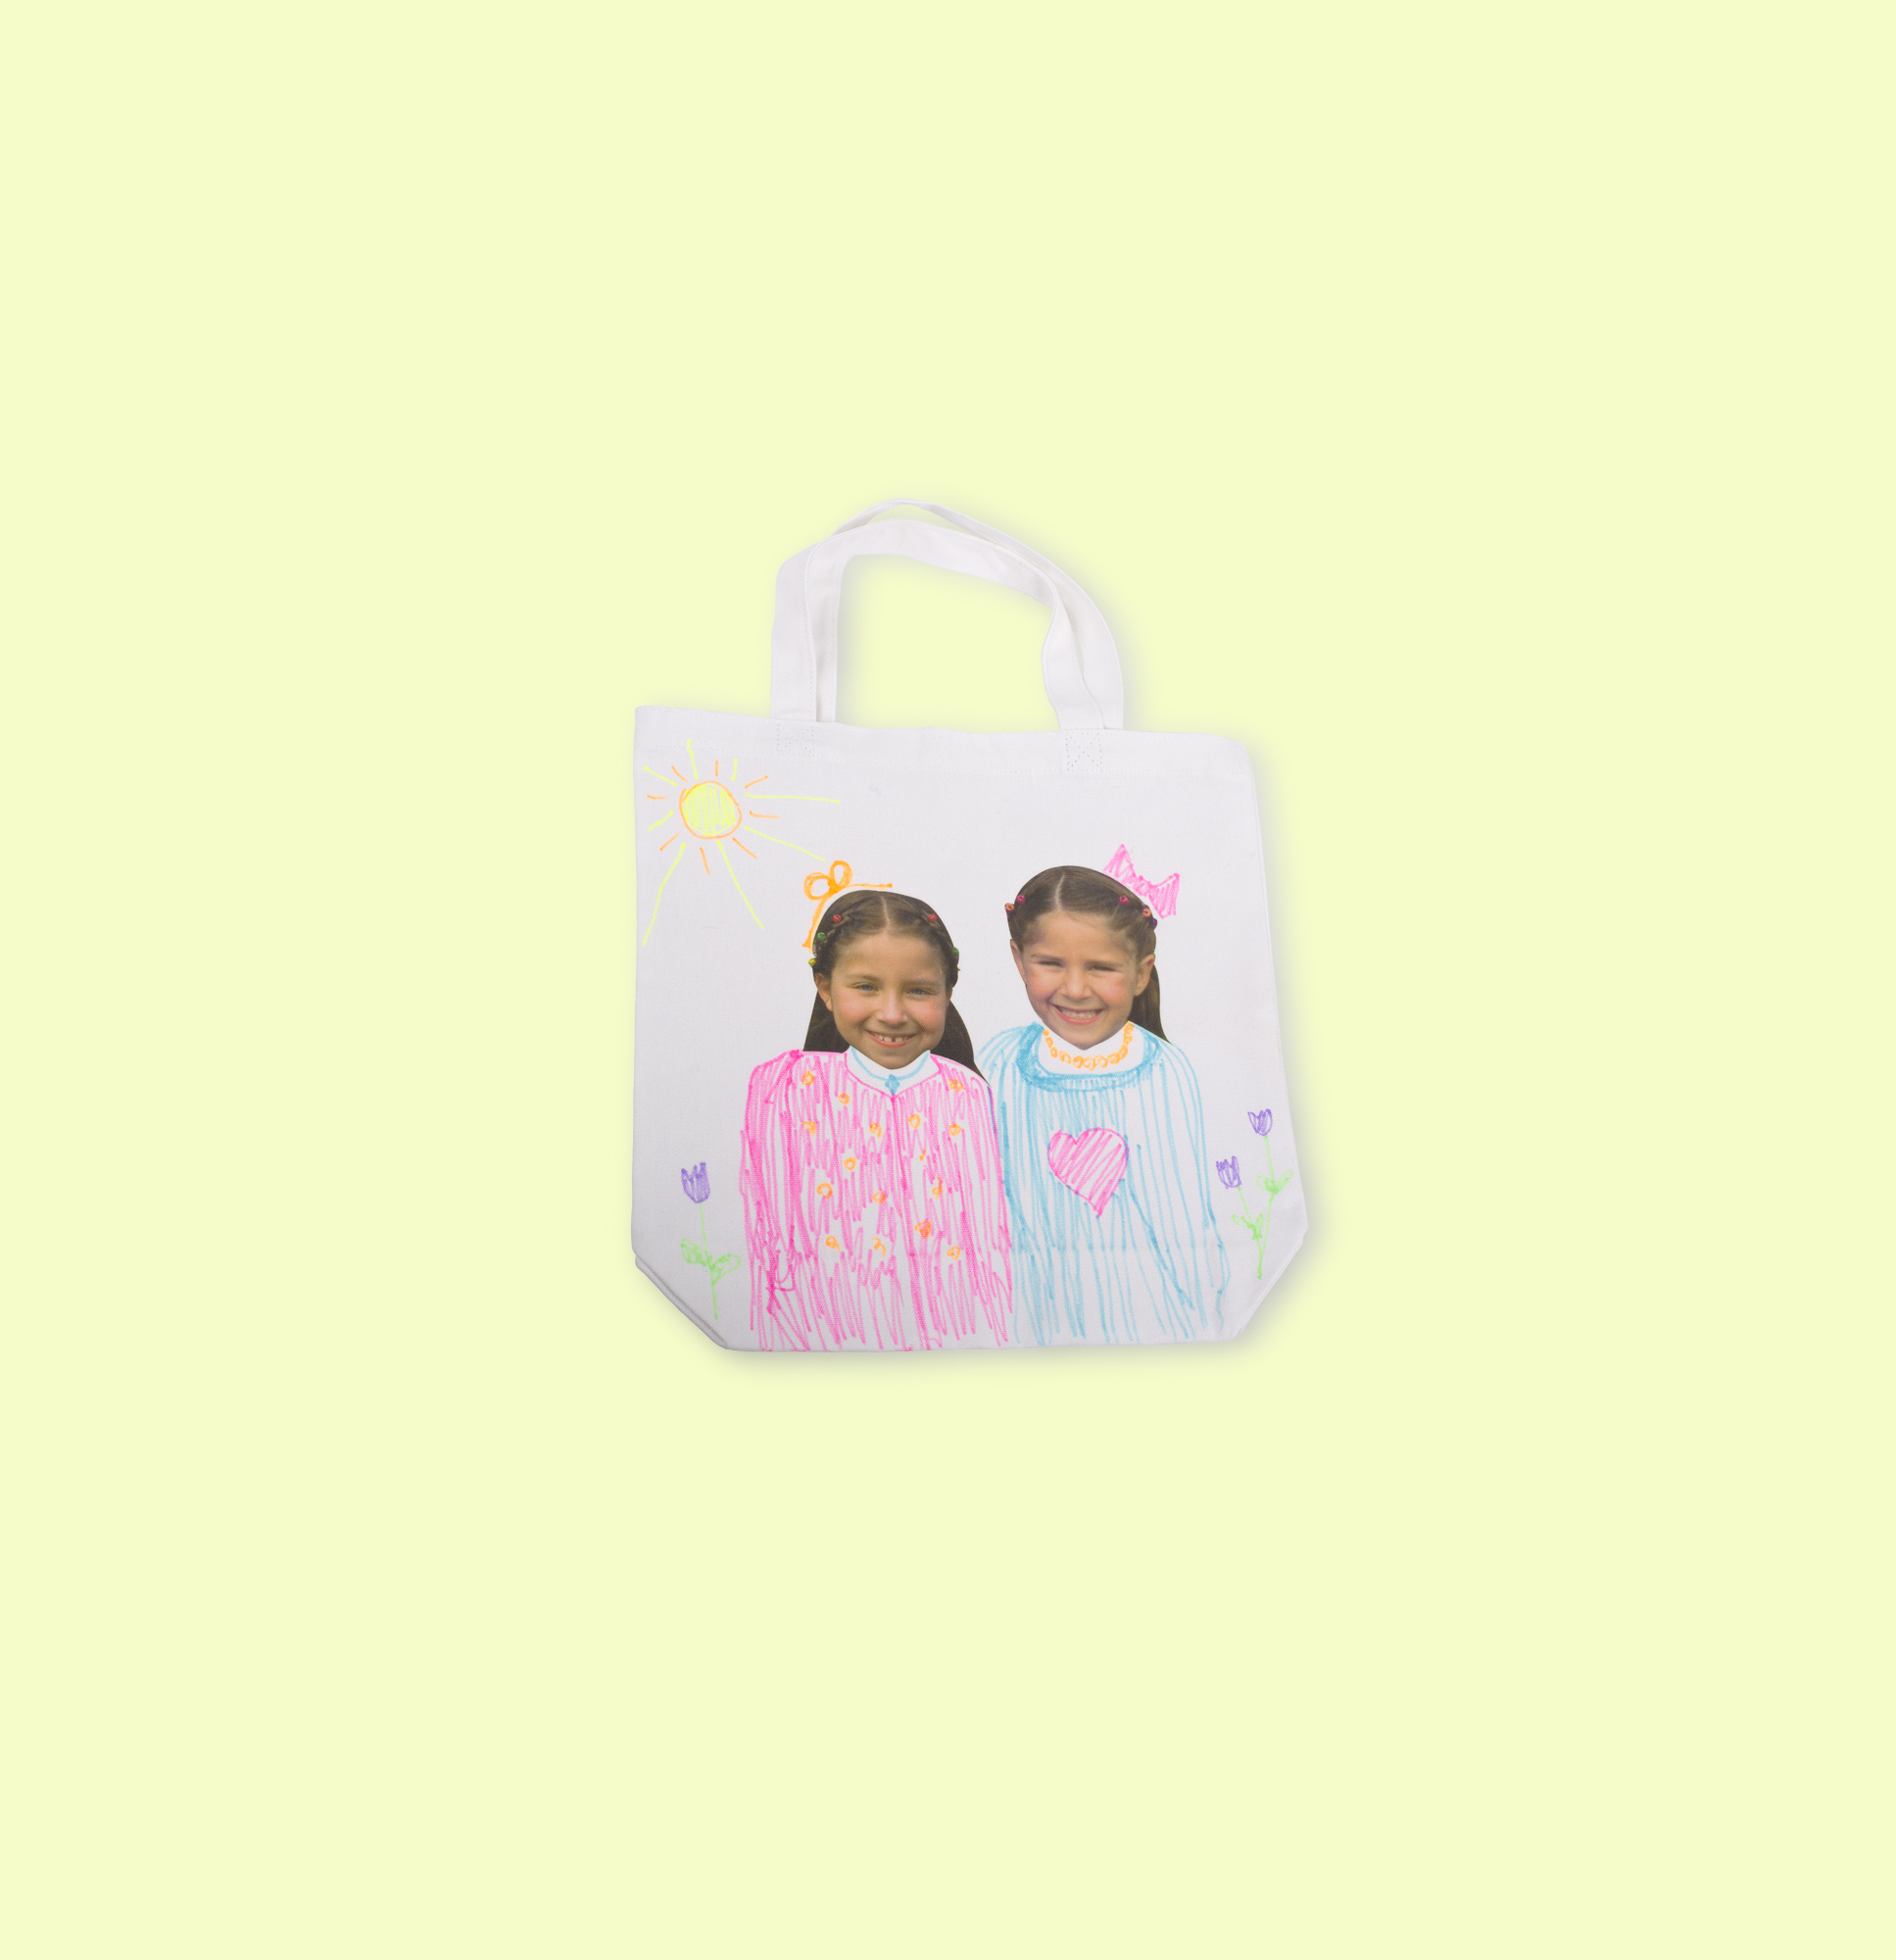
1. Choose photos of your family, print them on transfer paper, and cut out just the heads. You may want to use one piece of paper per photo so that the heads are large enough.
2. Use an iron to transfer the photos onto a plain tote bag.
3. Have kids use fabric markers to finish their bodies and decorate the bag.
2. Candle Holders
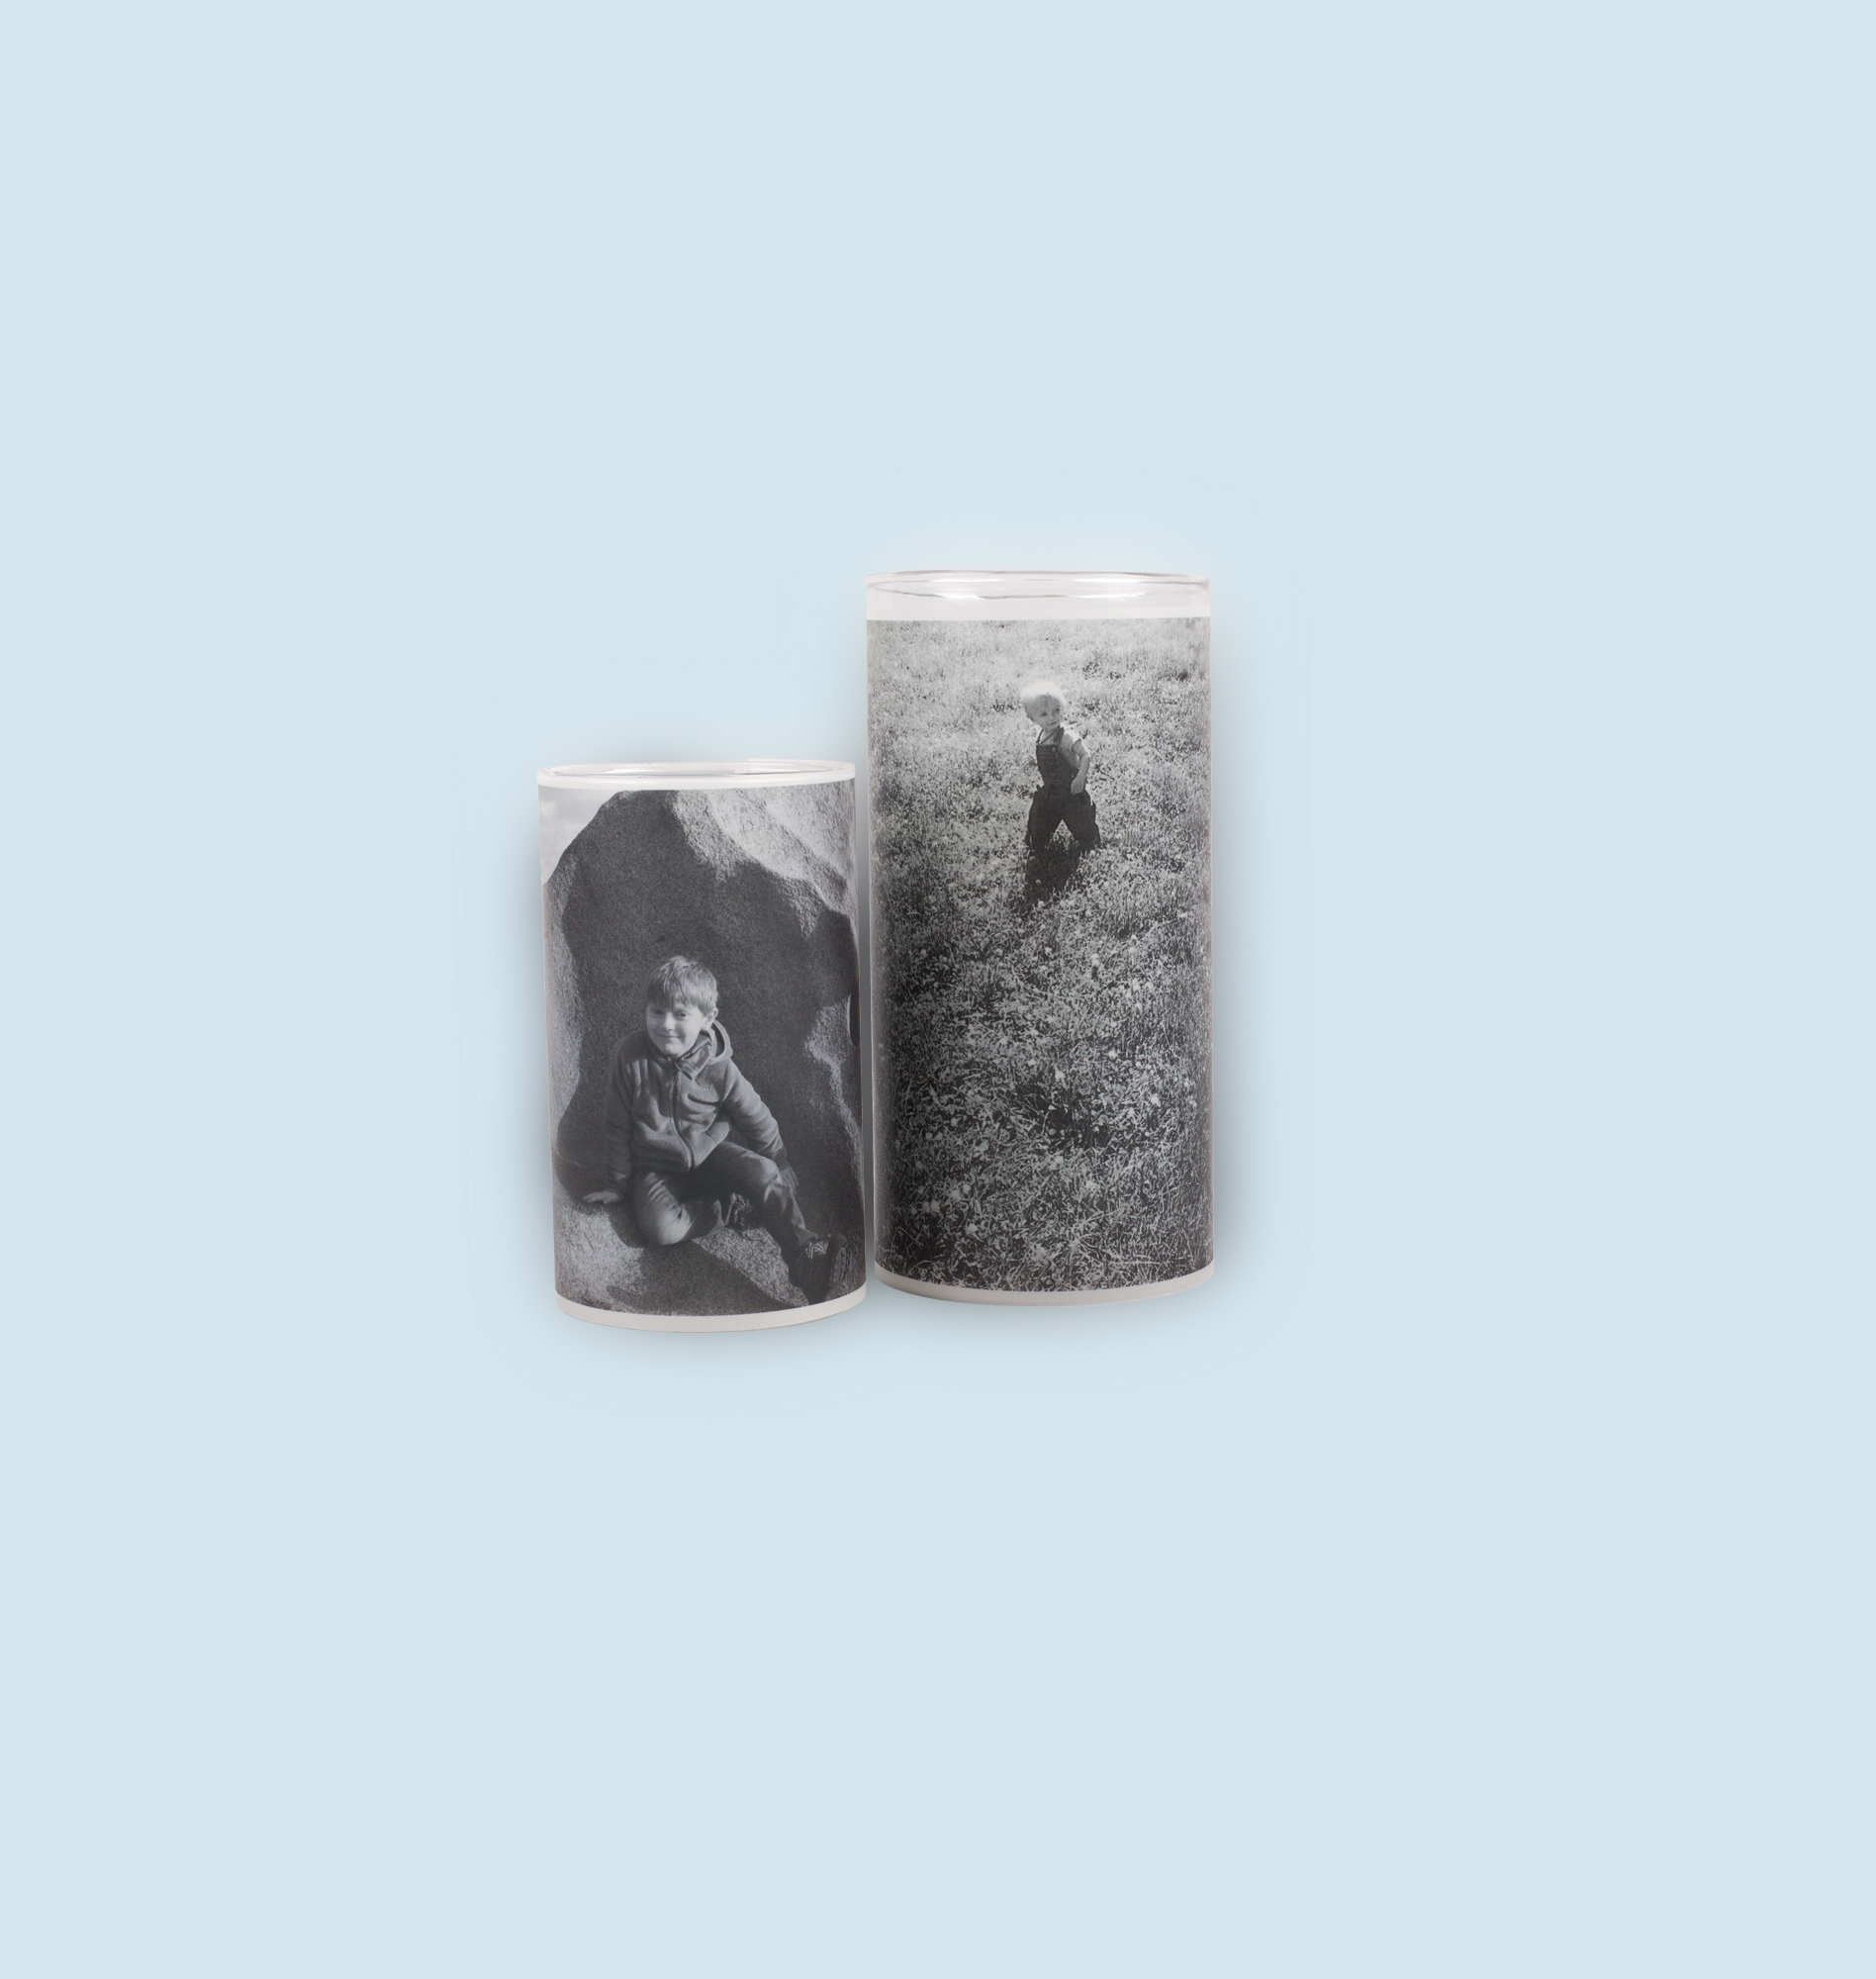
1. Print photos in black and white on vellum paper, which you can find at your local craft store. The paper will give the photo a frosted finish.
2. Wrap around a glass cylinder (you can choose the size), and secure with double stick tape.
3. Cookie Tin
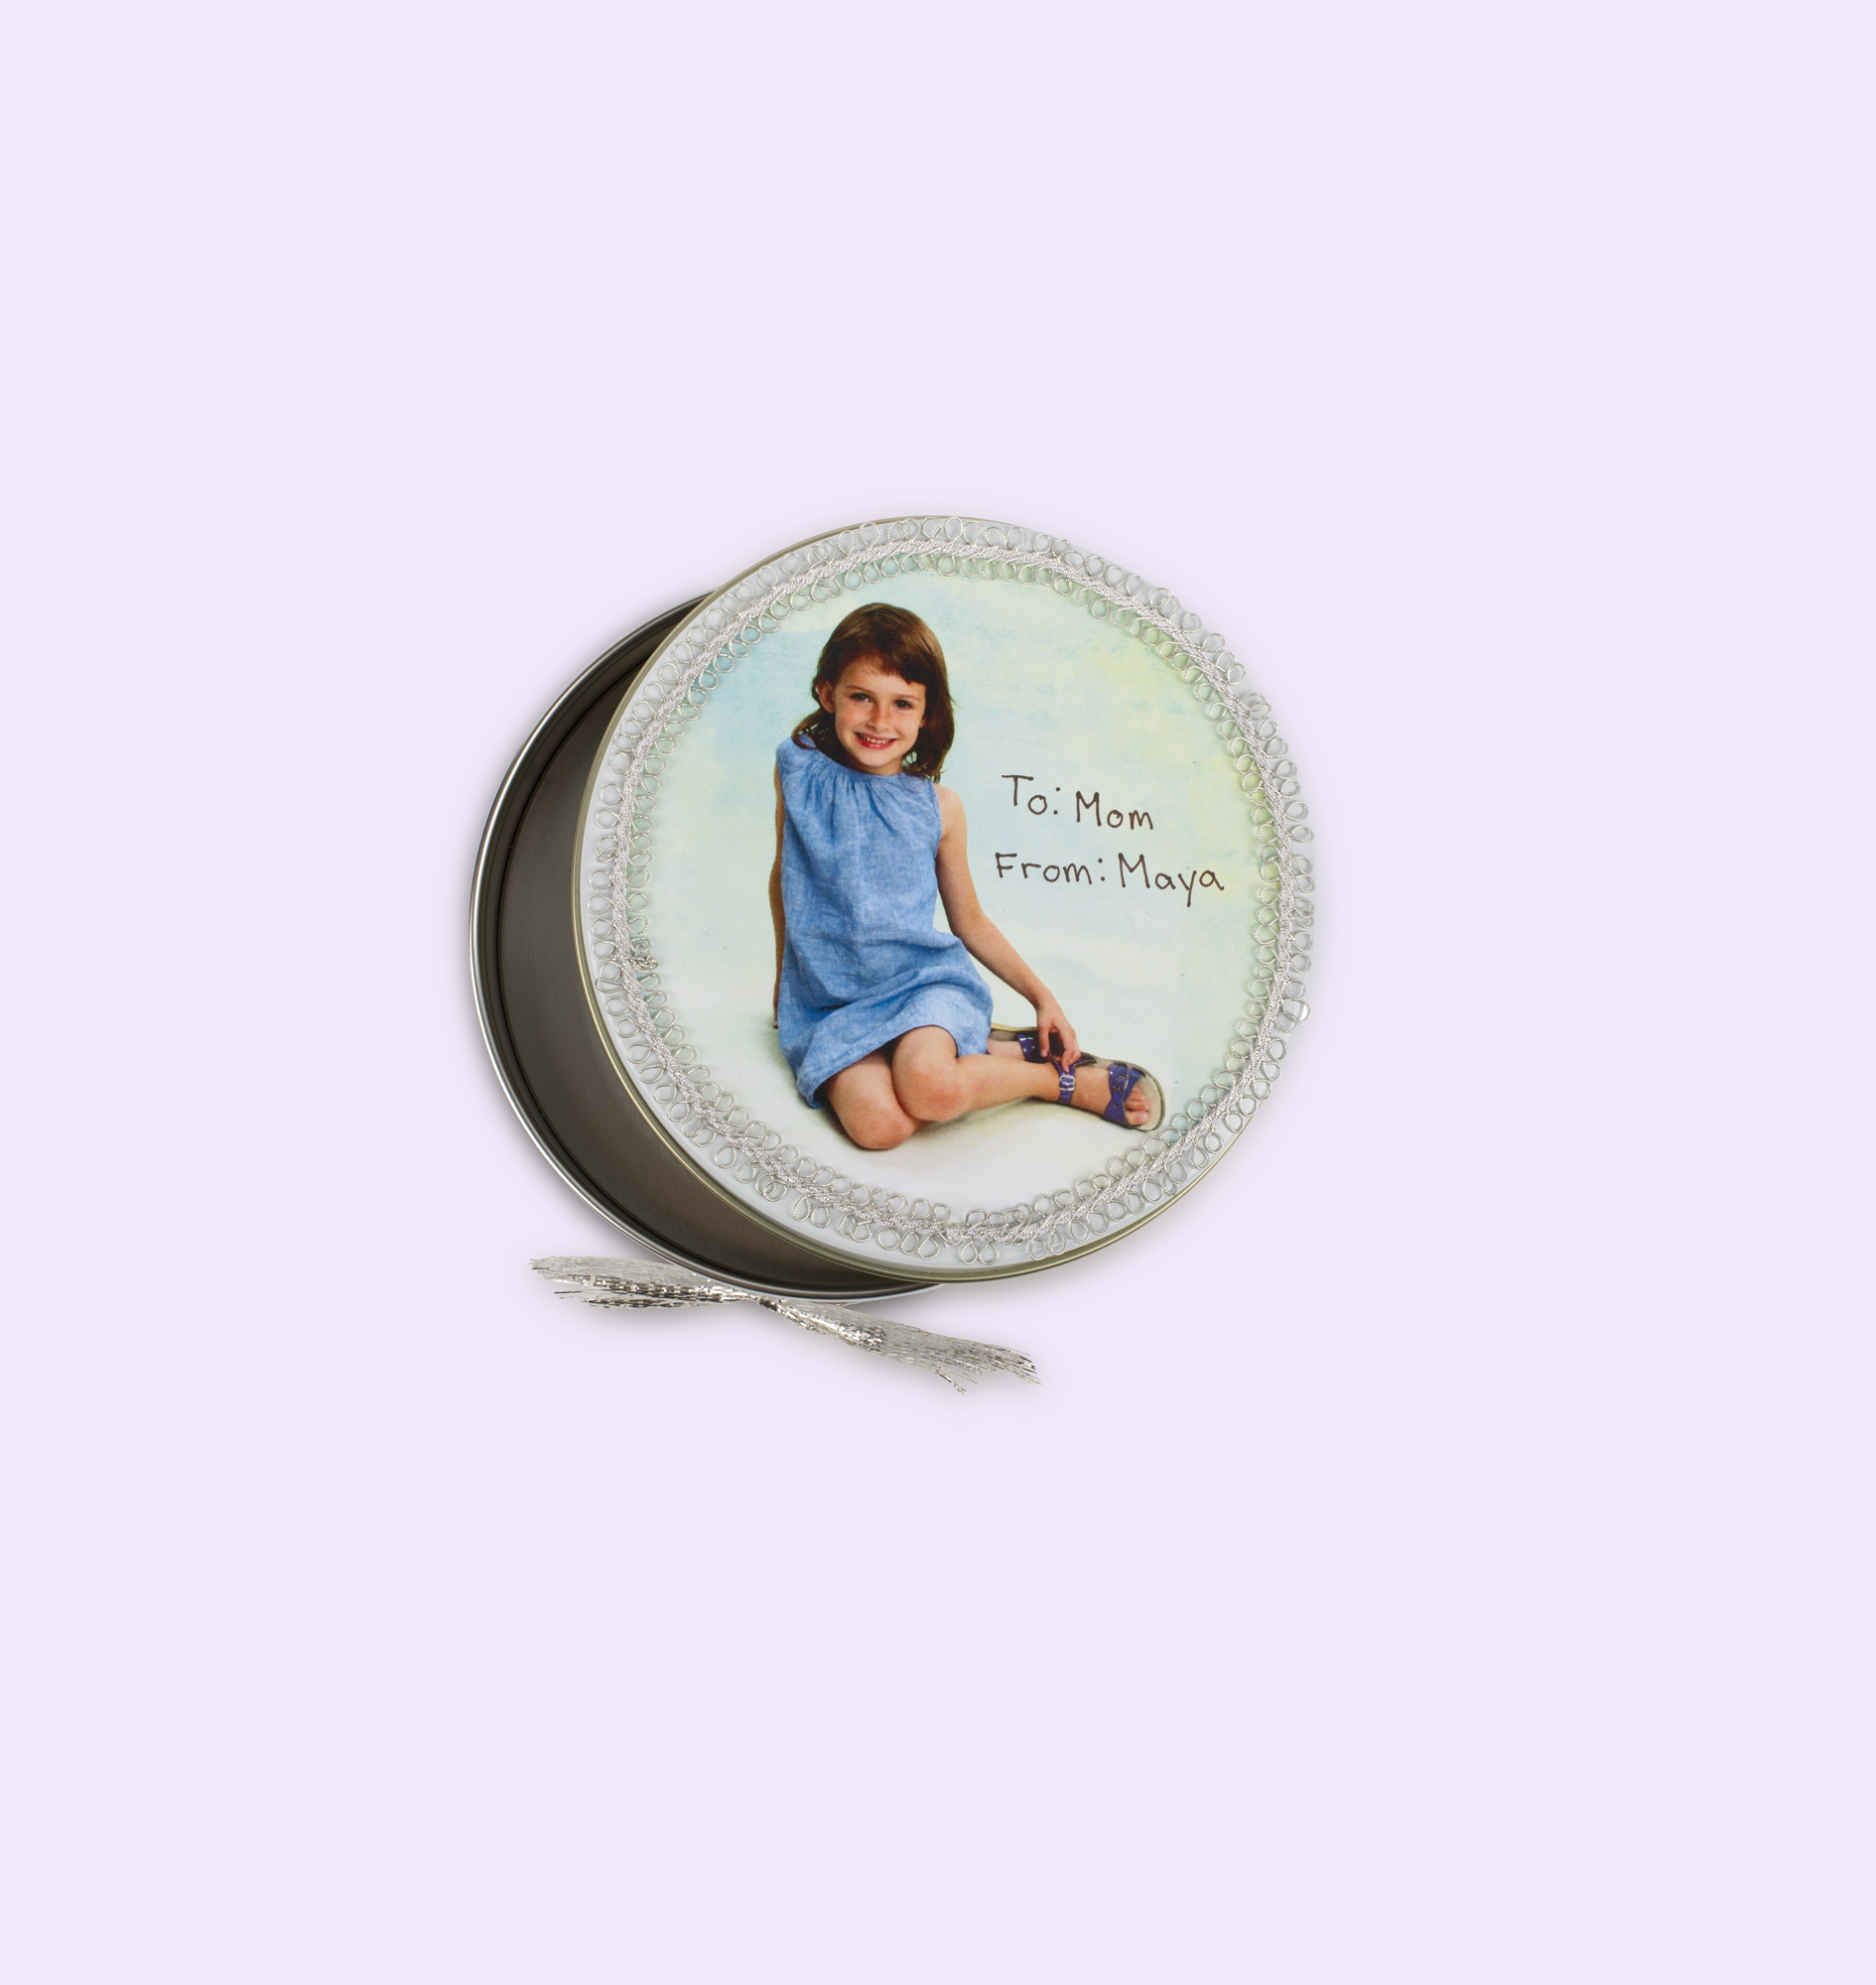
1. Use the lid of a cookie tin as a stencil around a family photo.
2. Use glue or double stick tape to adhere a circle-shaped photo to the lid of the tin.
3. Embellish the edge of the photo with a colorful or textured ribbon.
4. Bonus: Bake her favorite cookies to store inside!
4. Embellished Frame
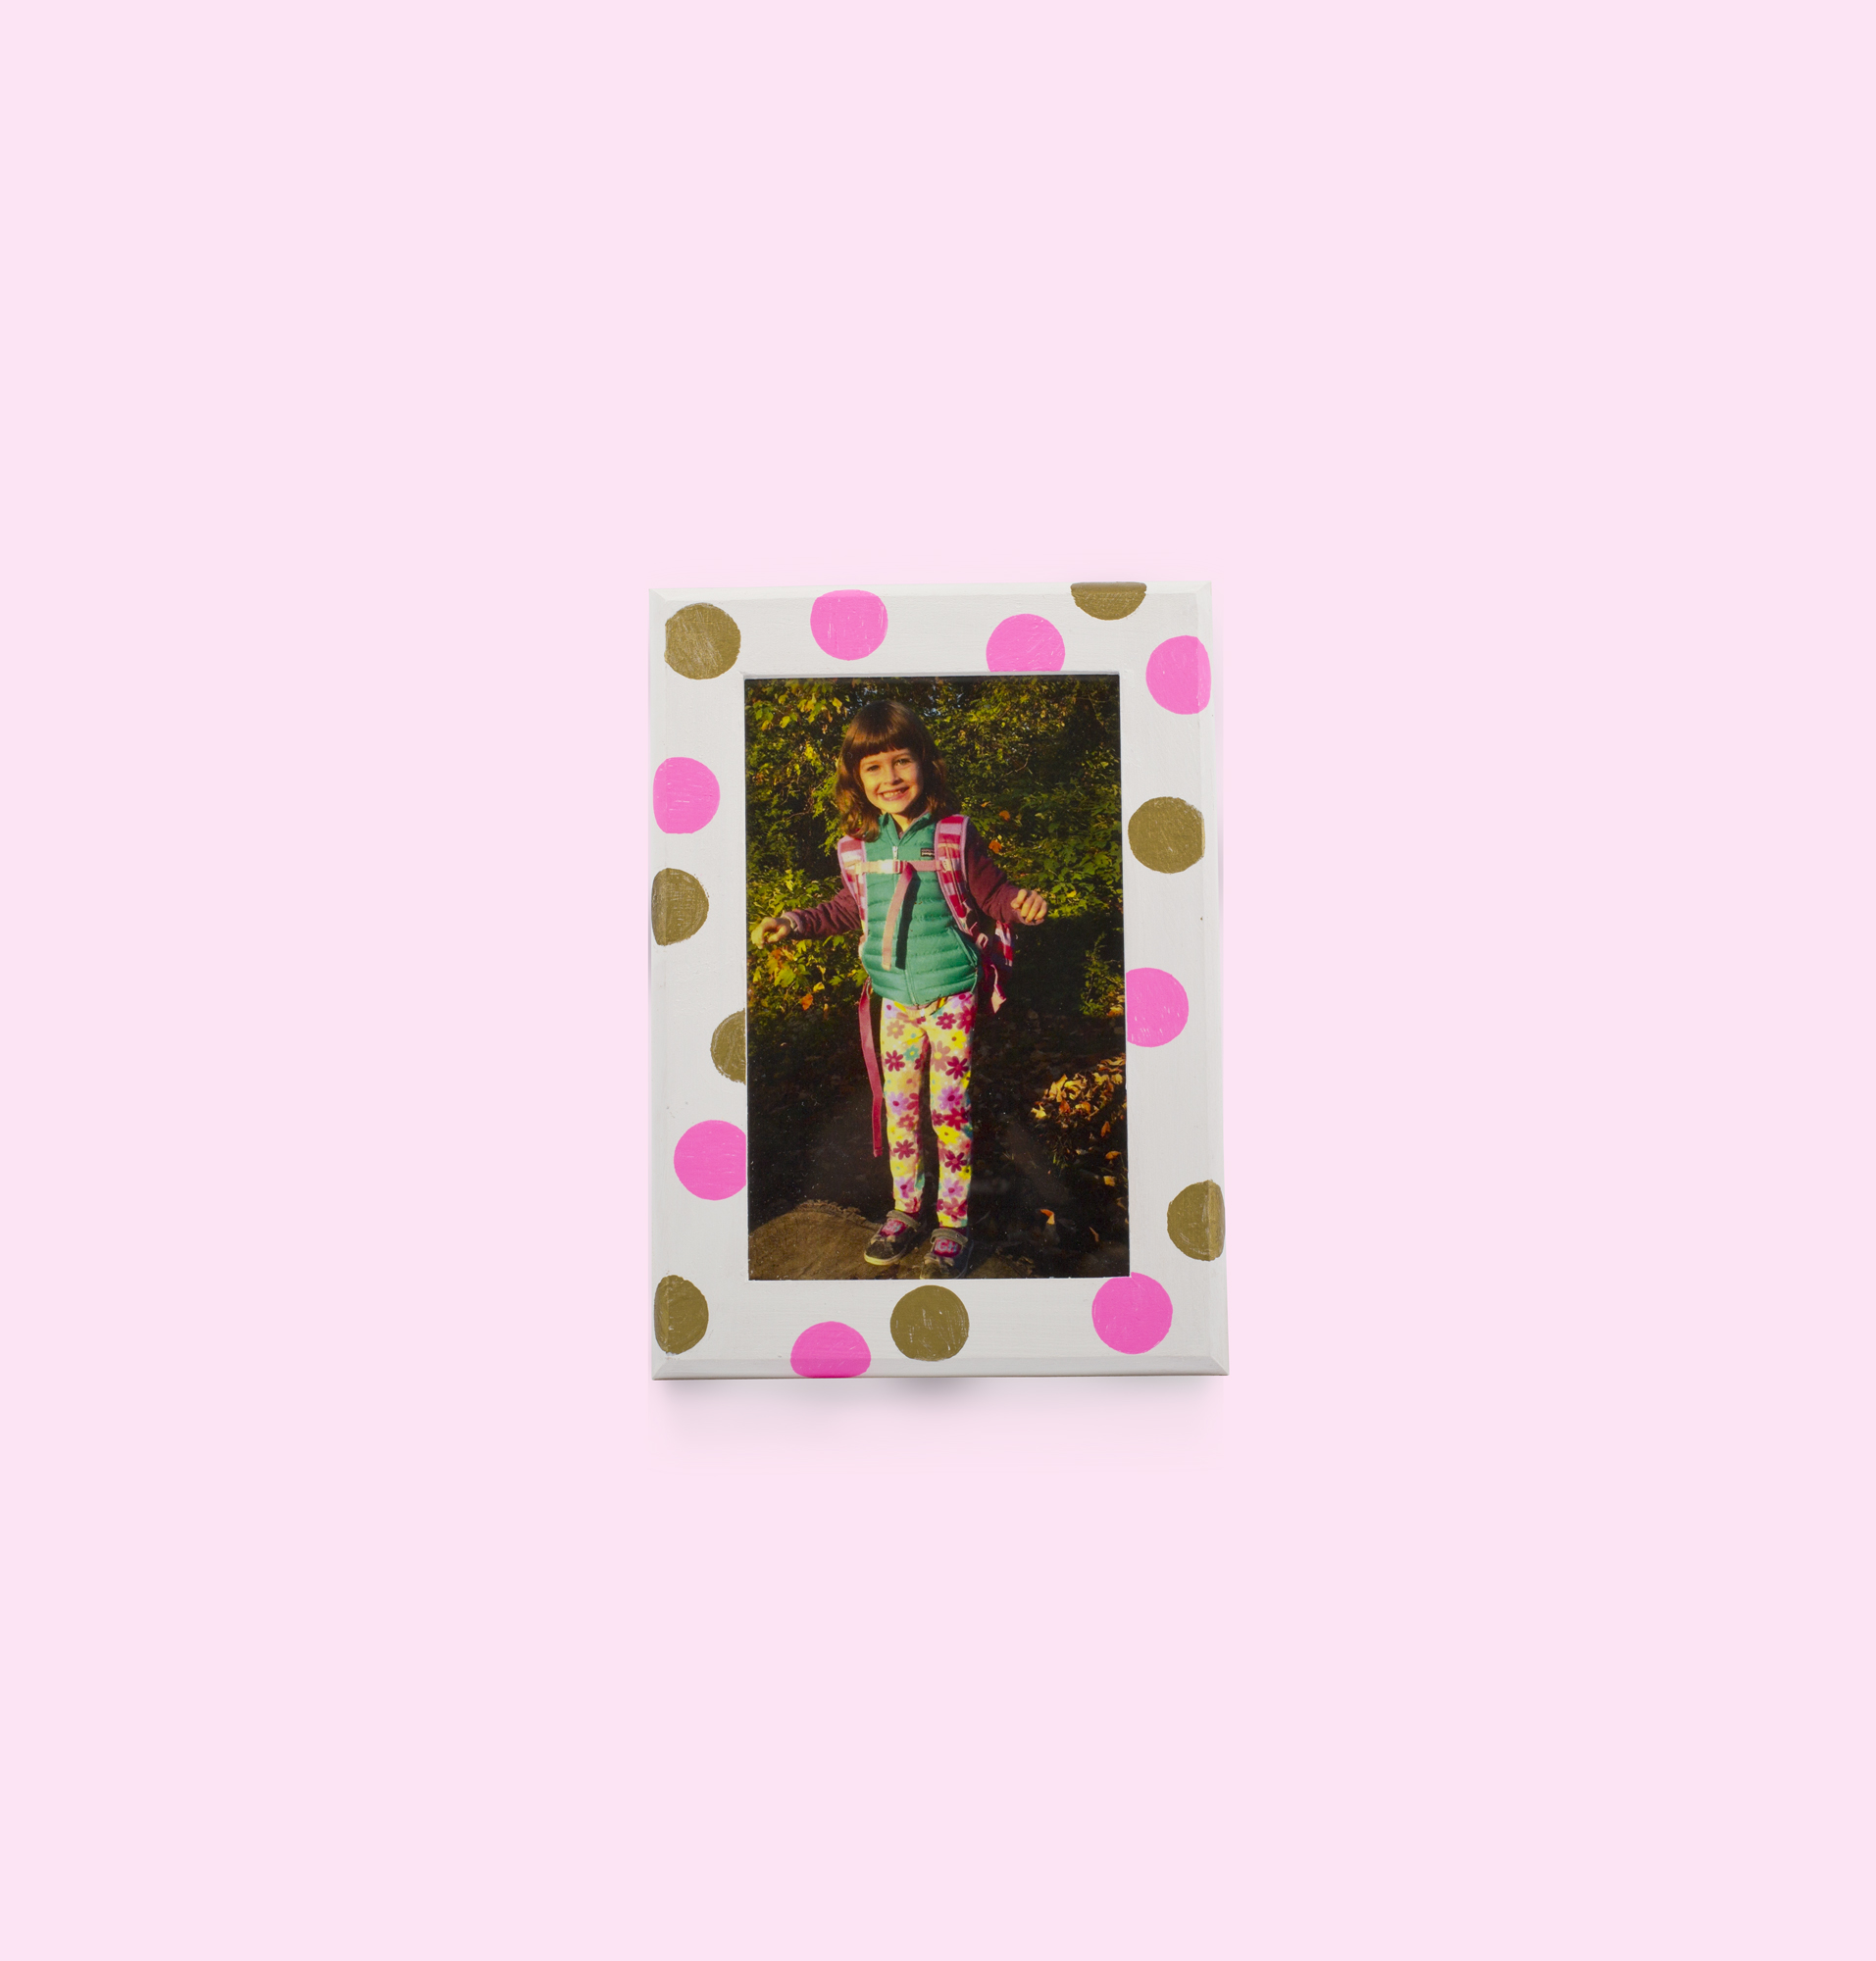
1. Paint a wooden craft frame a solid color.
2. Use a circle punch (or any other shape or symbol) to create a template out of construction paper. Trace circles around the frame.
3. Use paint pens to color in the circles.
5. Potted Flower Photos
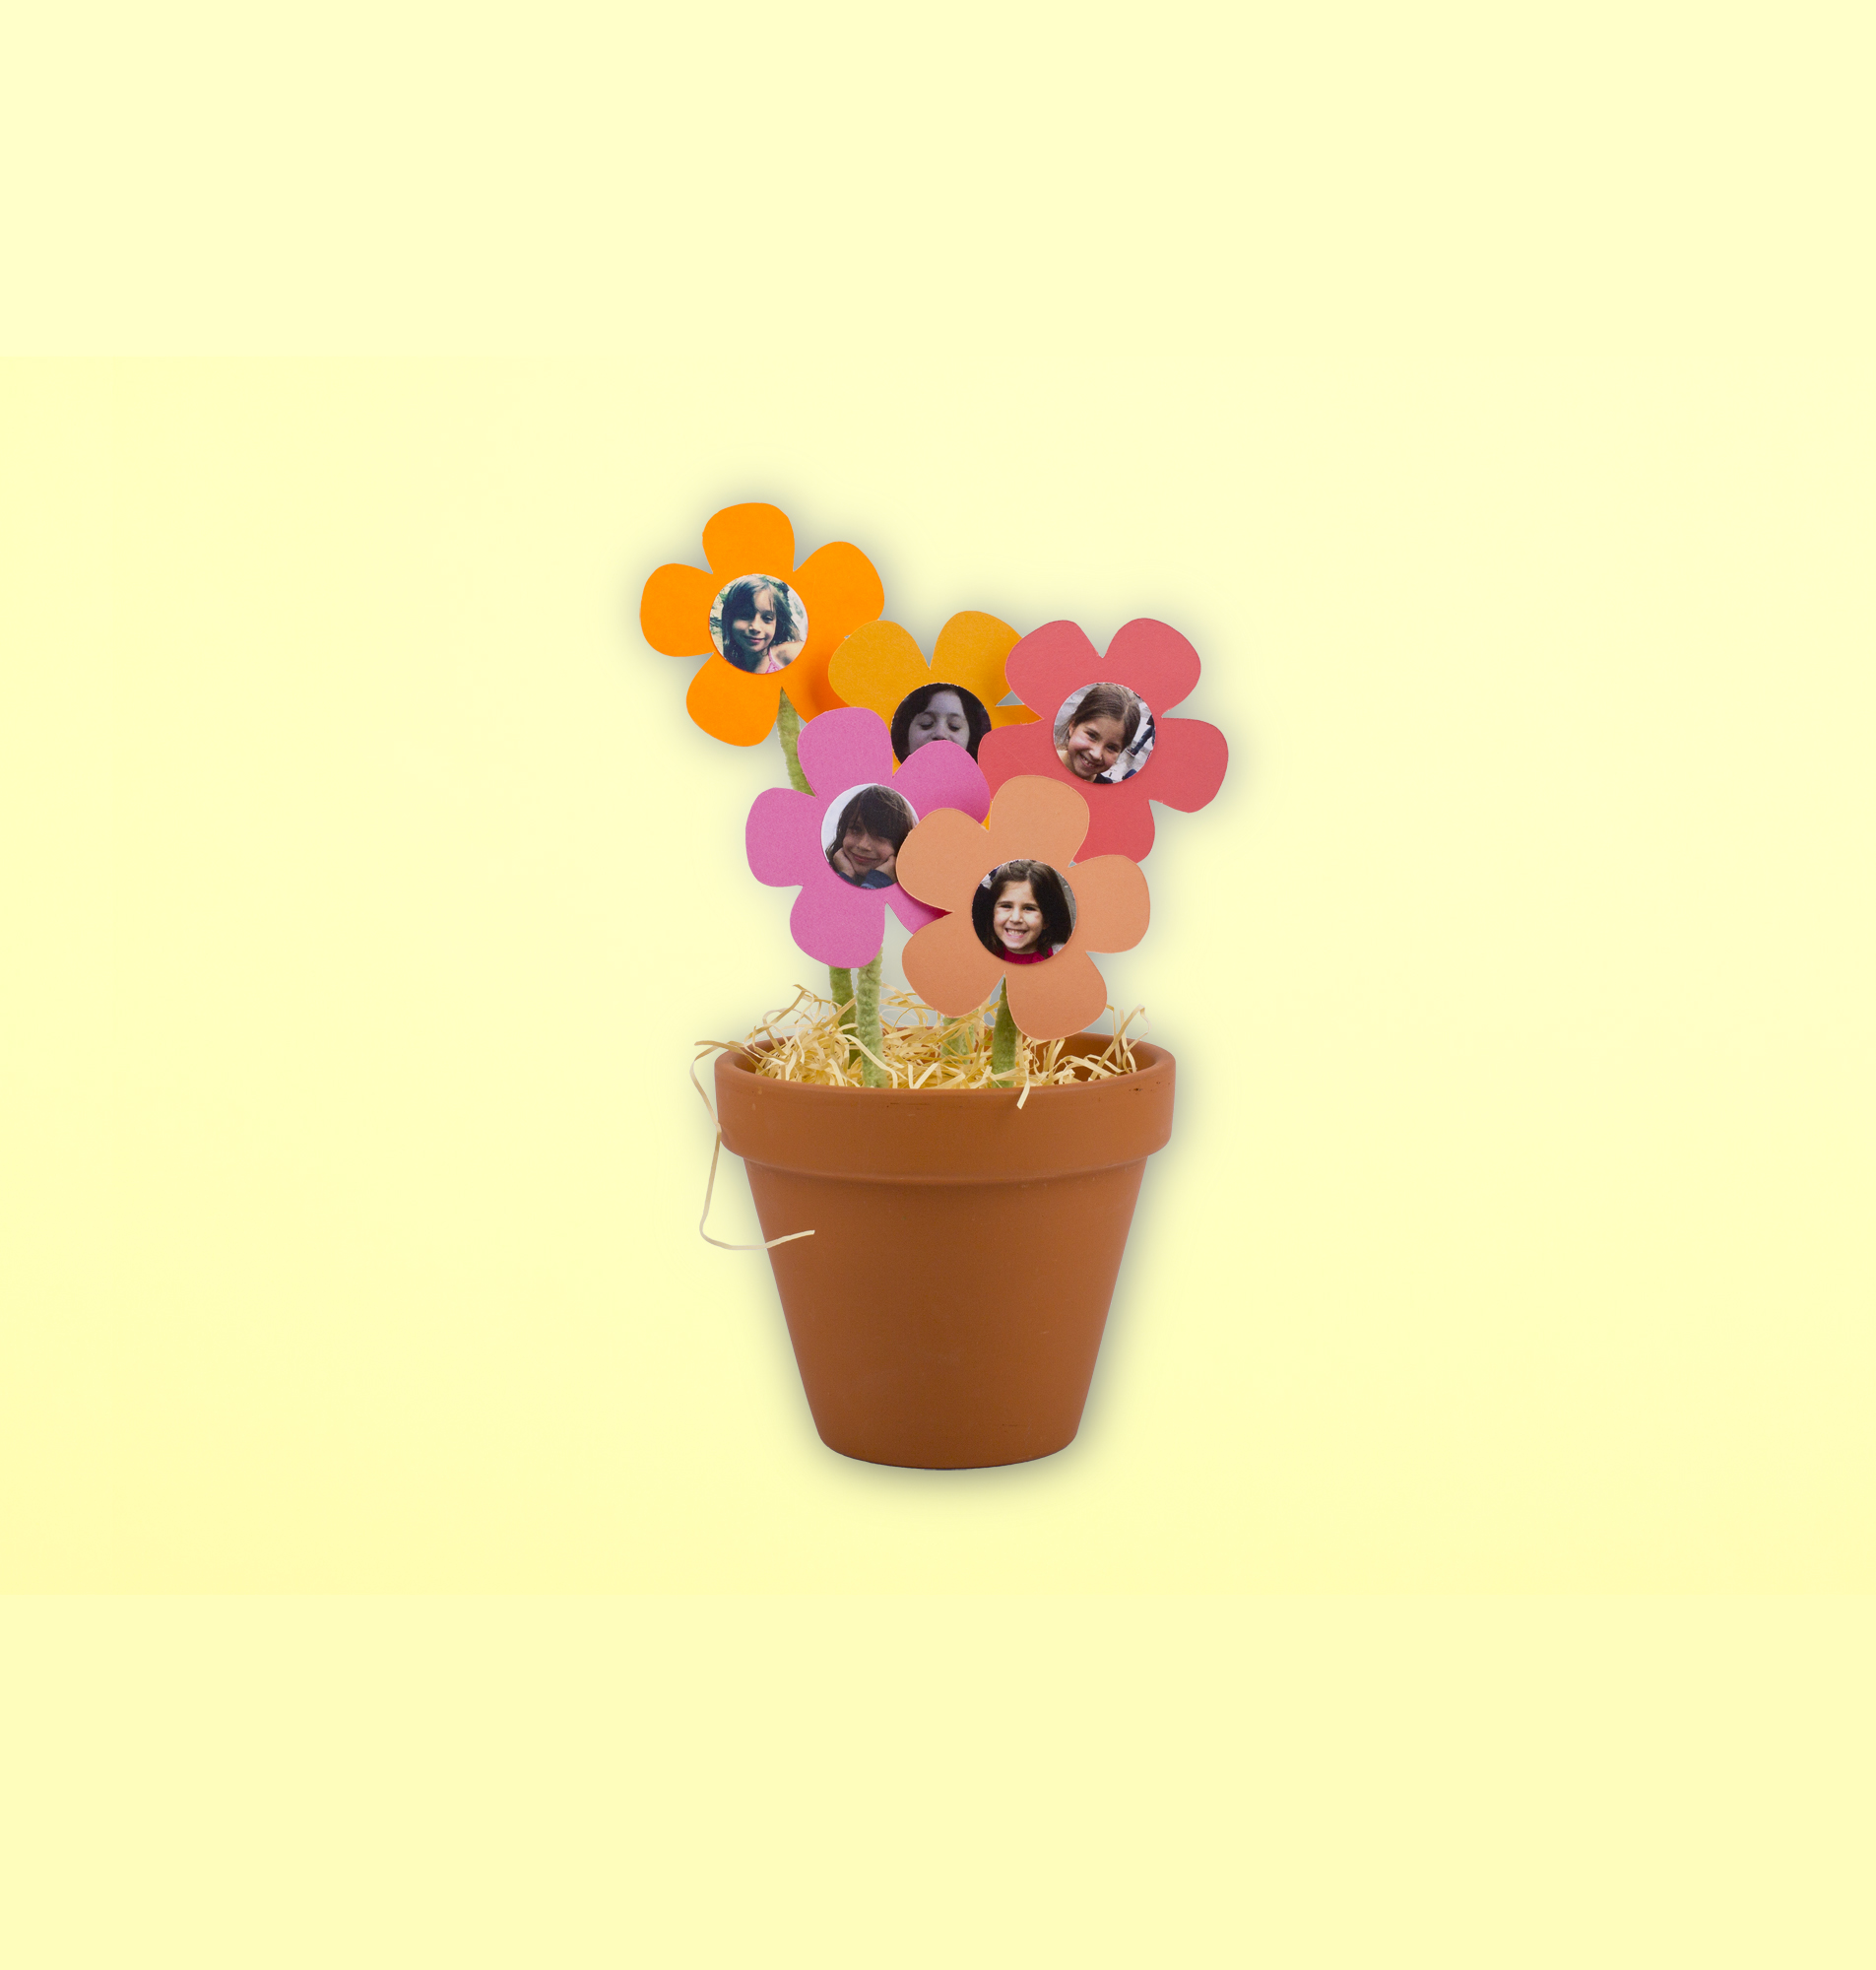
1. Use a circle punch to cut out faces from family photos.
2. Cut out colorful flower shapes from construction paper and glue family faces to the center of each flower.
3. Then, glue a pipe cleaner onto each flower to create the stem.
4. Place a Styrofoam ball into a pot, and secure pipe cleaners into the ball.
5. Cover the Styrofoam with shredded paper.
6. Dry Photo Snow Globe
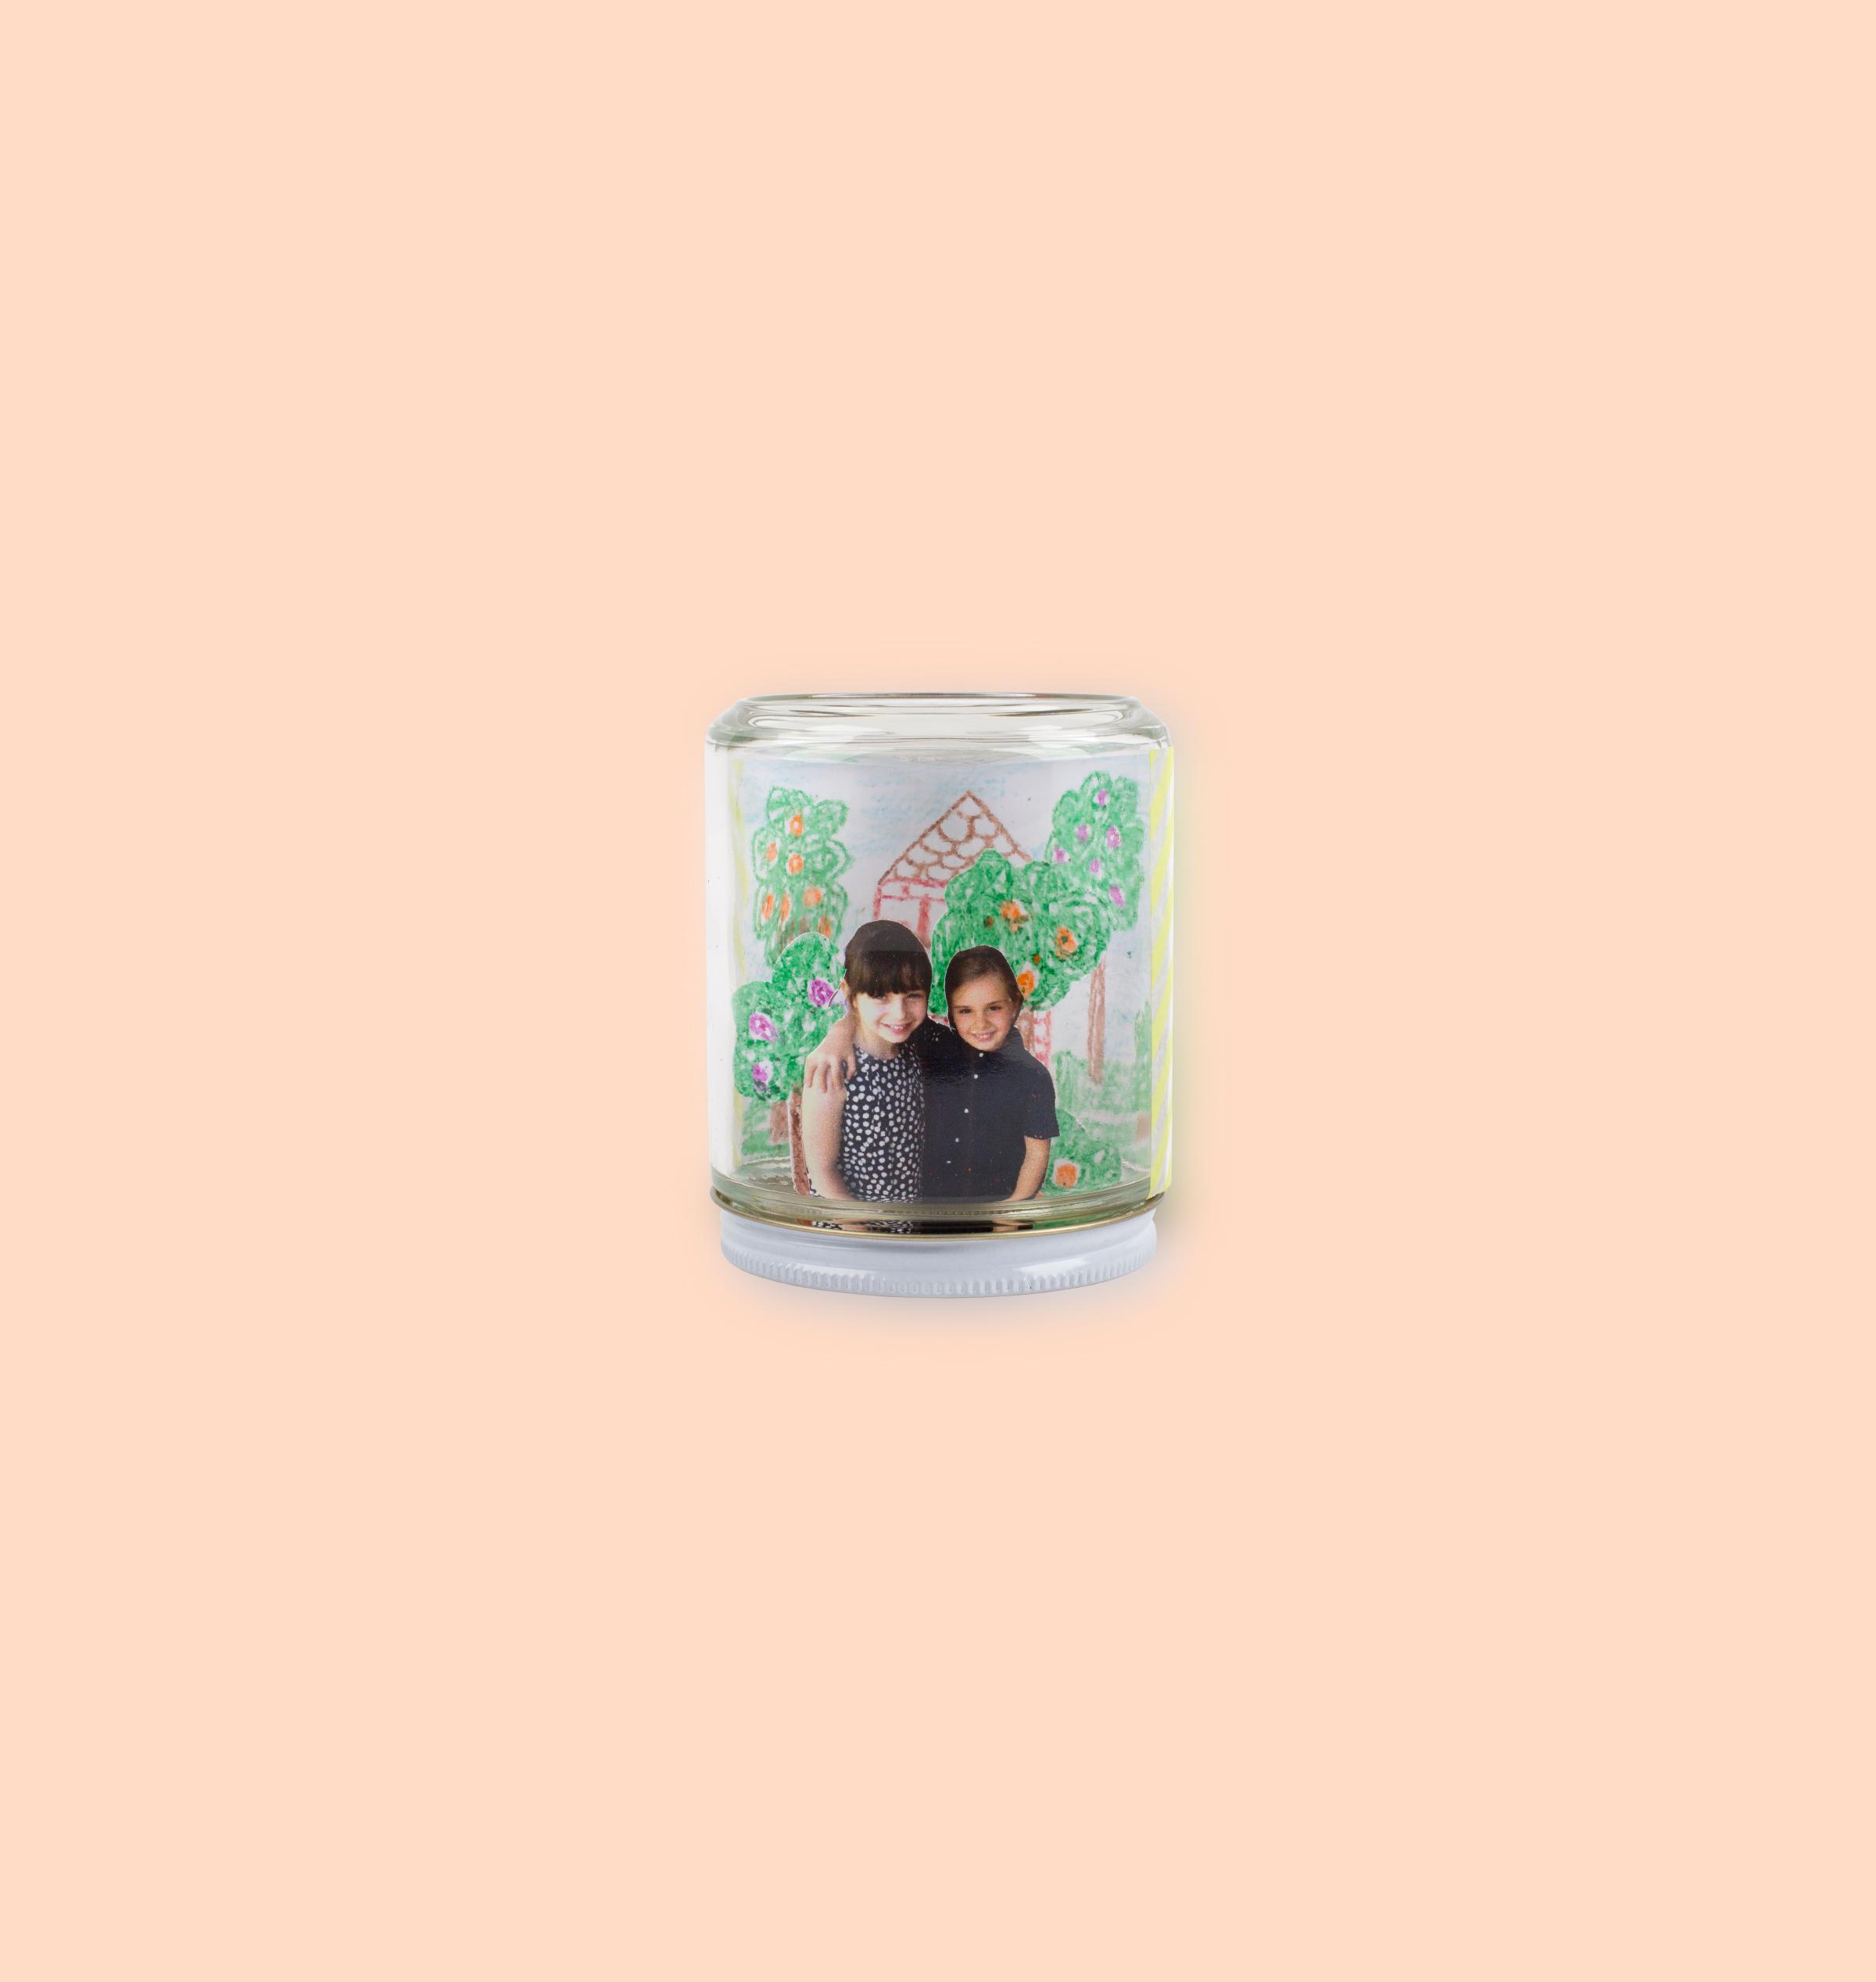
1. Cut out a family portrait, but just include the bodies and none of the background scenery.
2. Create a background illustration and tape it to the side of a clear mason jar. This will be the back of the snow globe.
3. Create additional trees and cut them out.
4. Tape the trees and family portrait to the inside of the lid. Secure the lid onto the jar, and turn it upside down.
7. Matchbox Album
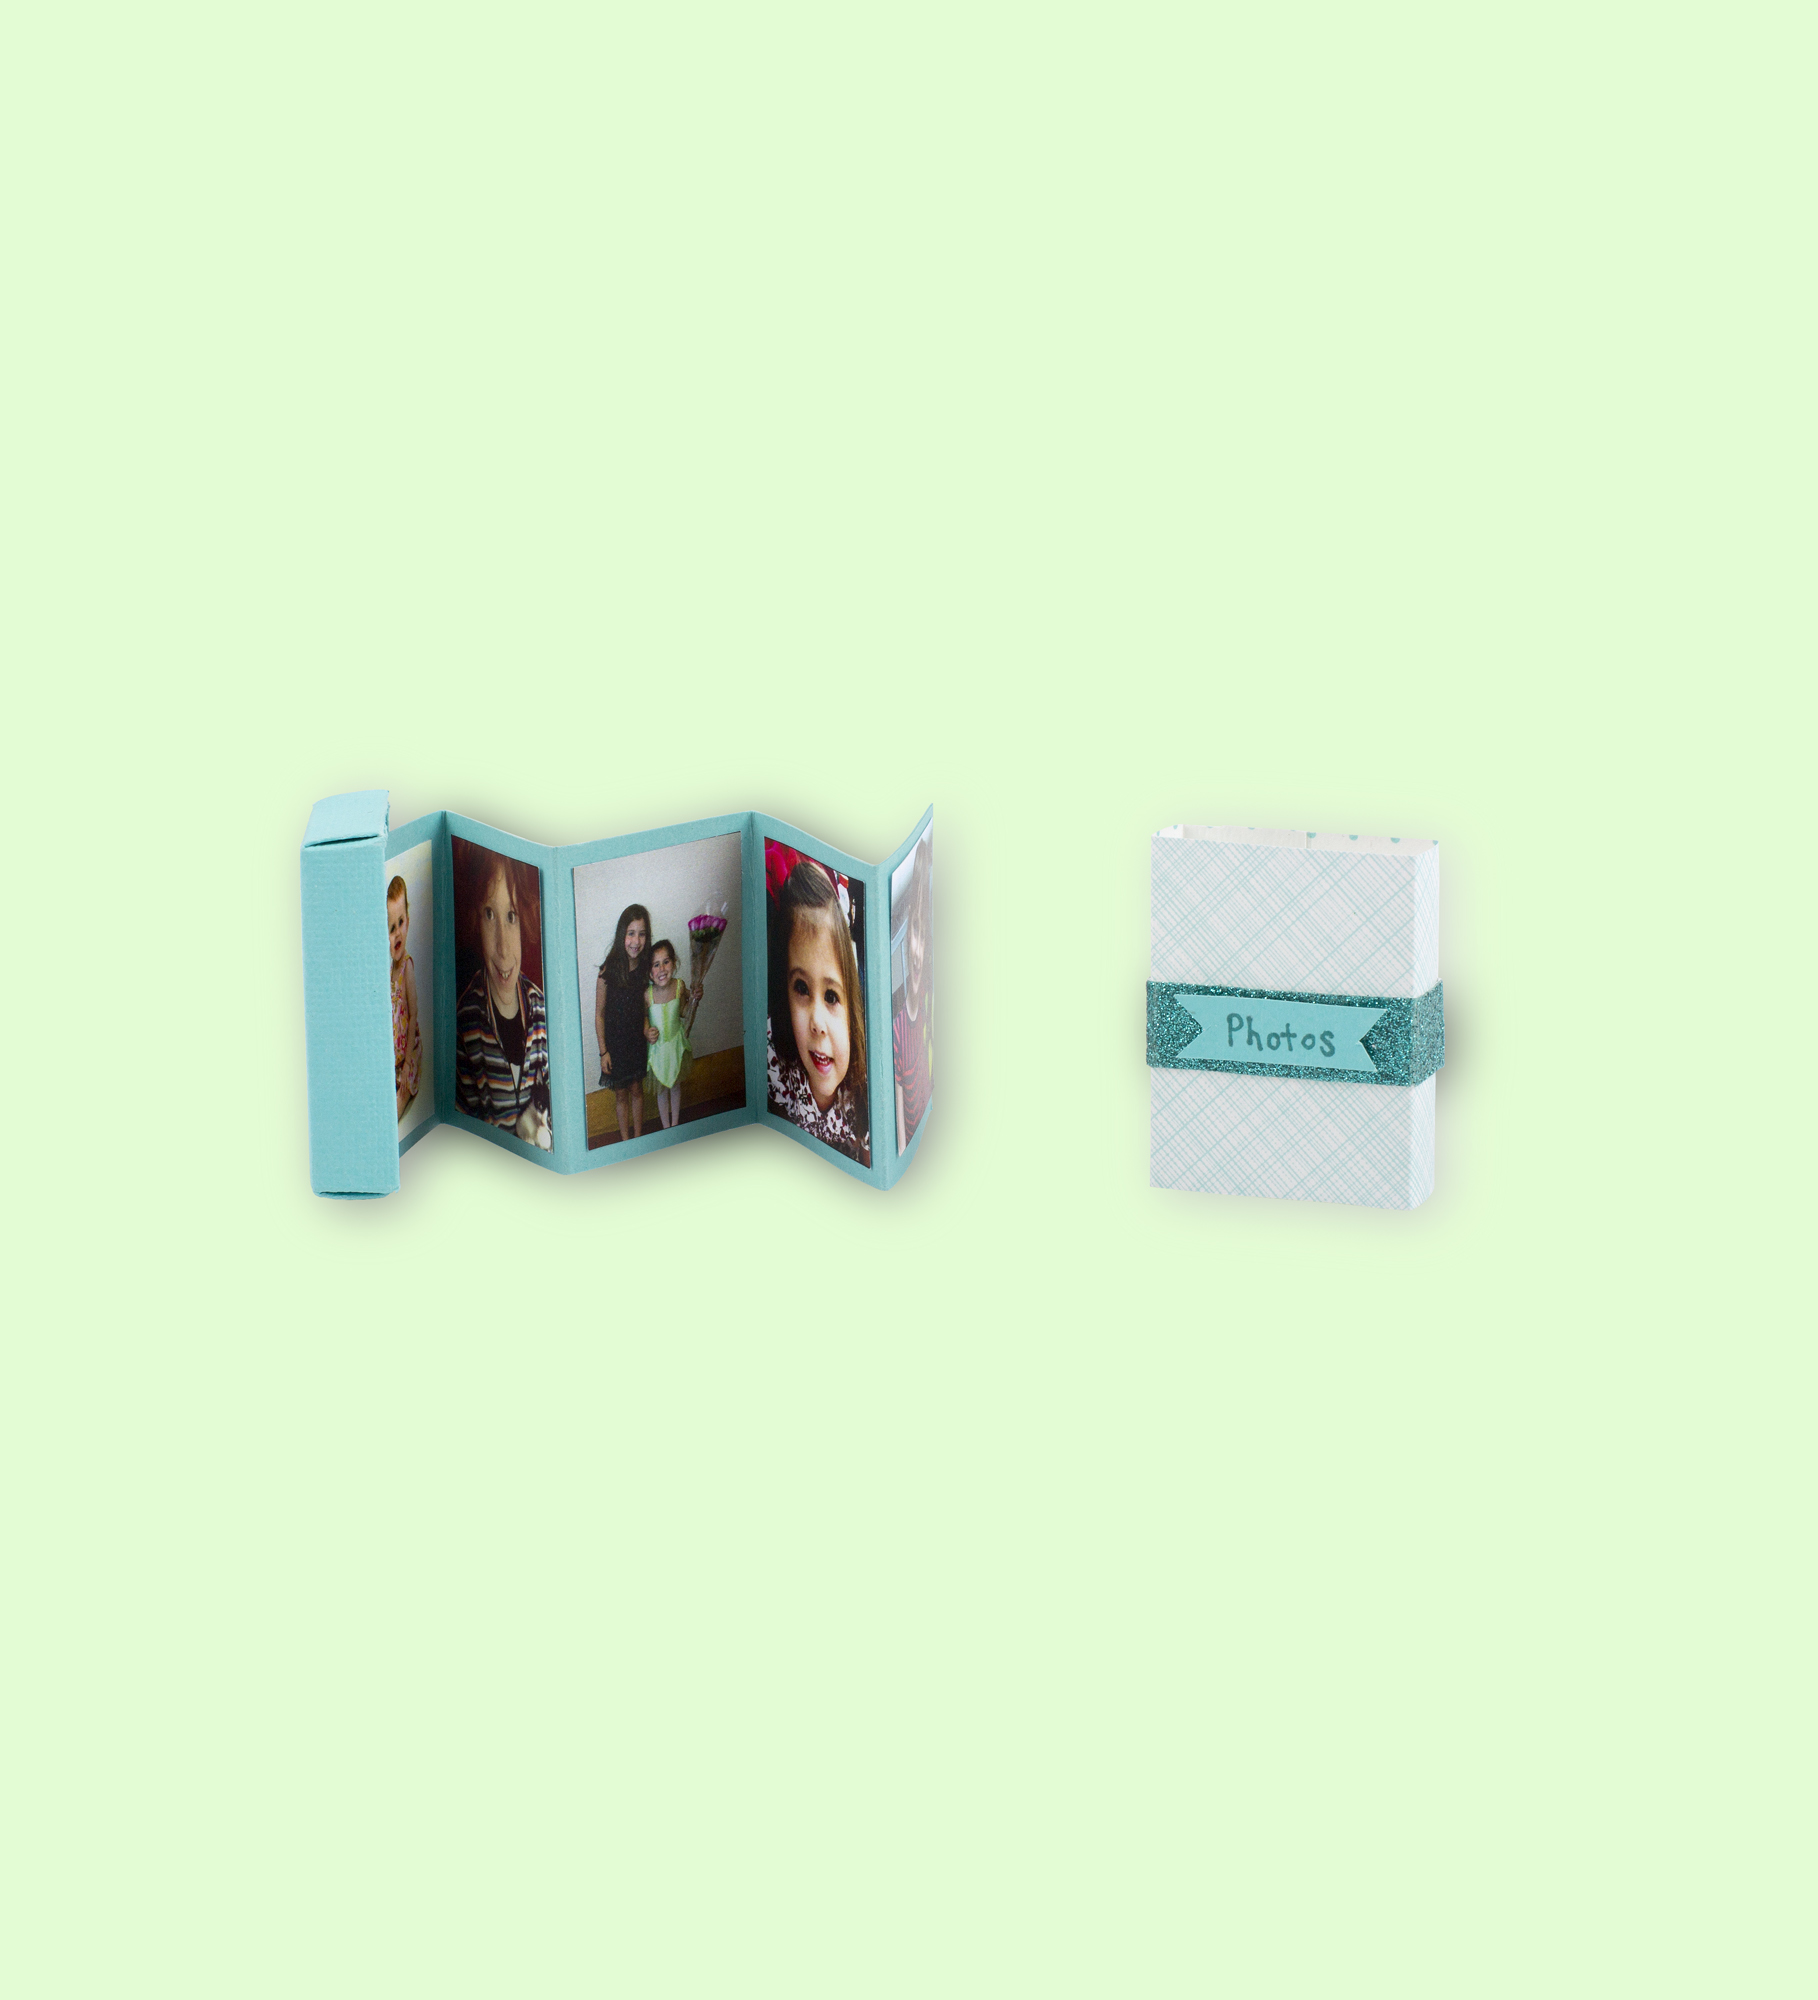
1. Cover a matchbox in decorative paper—like wrapping paper scraps or craft paper.
2. Embellish the front with a “Photos” label.
3. Cut a long strip of construction paper to the height of the box, and accordion fold it a few times. Make sure the folds are thick enough to accommodate small, wallet-sized photos.
4. Tape one end to the inside of the box.
5. Use double stick tape to secure a few photos to the folds.
This article originally appeared on Real Simple.
More from Real Simple:
More Must-Reads From TIME
- The 100 Most Influential People of 2024
- Coco Gauff Is Playing for Herself Now
- Scenes From Pro-Palestinian Encampments Across U.S. Universities
- 6 Compliments That Land Every Time
- If You're Dating Right Now , You're Brave: Column
- The AI That Could Heal a Divided Internet
- Fallout Is a Brilliant Model for the Future of Video Game Adaptations
- Want Weekly Recs on What to Watch, Read, and More? Sign Up for Worth Your Time
Contact us at letters@time.com