I’ve managed to get myself a little bit of a reputation when it comes to pie — so much so that I’ve baked 34 pies in the last 14 days. This reputation started with one simple fact: I love pie, and I am not afraid to sing it from the rooftops.
While there are plenty of details to consider when making a pie, it is, at its core, one of the simplest desserts ever. My crust has only four ingredients: all-purpose flour, a pinch of salt, butter, and ice water. I like to keep things simple because I often find myself making pies at the last minute. This ratio is easy to remember, and easy to pull off.
The trick is learning to manipulate these four ingredients properly to achieve the perfect (or even just pretty darn good) result. That’s the thing about pie — even an imperfect one is still amazing.
More: Once you have a handle on your crust, fill it with fresh blueberries.
Of course, you can always experiment with different fats or added flavors (it’s great with rosemary, vanilla sugar, or even flaky salt for a savory pie). But today we’re just talking about the basics, so let’s dig in.
Step 1
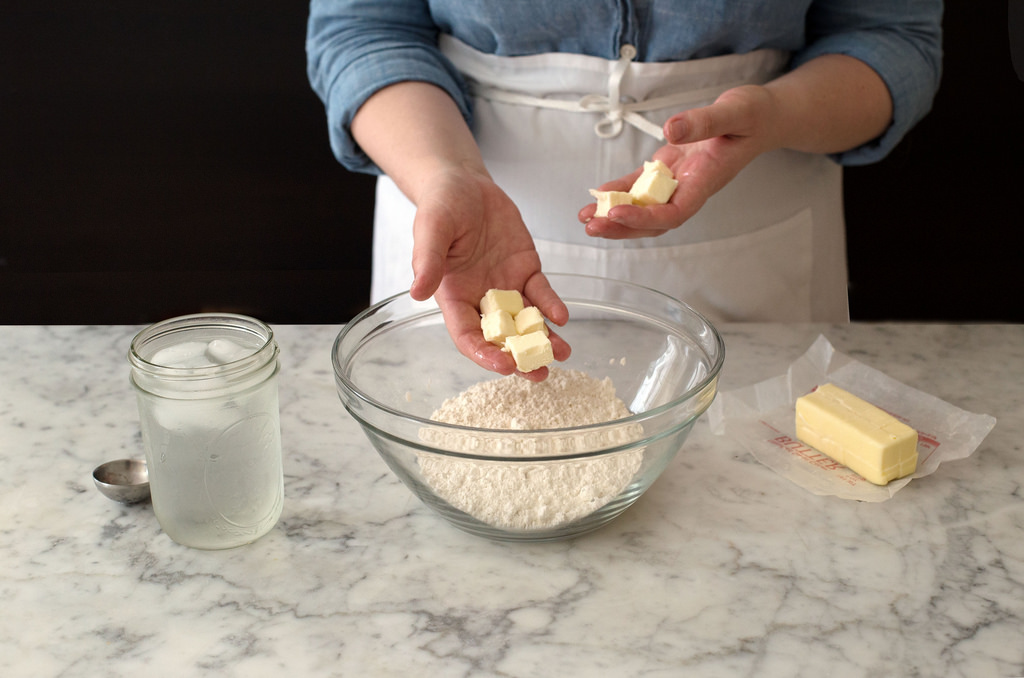
Start with cold ingredients. I don’t usually chill my flour, but in the heat of the summer, it can only help. Definitely start with ice water and well-chilled butter, cut into 1/2-inch cubes. I like to chill all of my ingredients in the freezer for 5 to 10 minutes before I get started — you can even throw in the mixing bowl, too.
Step 2
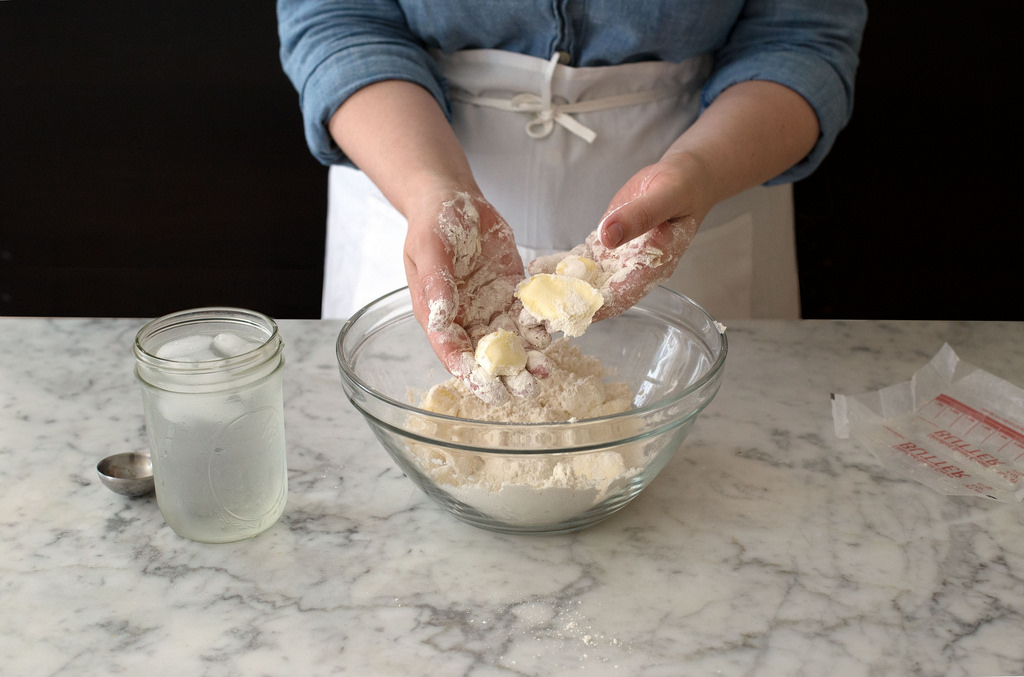
Mixing by hand gives you the most control, which makes you less likely to overmix your dough. To do this, toss the cubed butter into the flour to coat each piece. After it’s well coated, begin to “cut in” or “rub in” the flour: Shingle the butter between the heels of your hands, pressing them against the butter in opposite directions. (This melts it less quickly than using your fingers does.) The idea is to flatten the butter into big shards. Continue to toss the butter in with the flour as you work to re-coat the shingled pieces.
Step 3
If you have hot hands (or just a hot kitchen), a food processor works, too. Start by cutting the butter into slightly larger cubes (roughly 3/4-inch). Toss the butter in flour to coat before adding it to the food processor, then pulse in 3-second bursts; I find that 10 to 15 pulses usually do the trick. Once that’s done, it’s best to add the water by hand; the food processor blade tends to over-mix pie dough.
Step 4
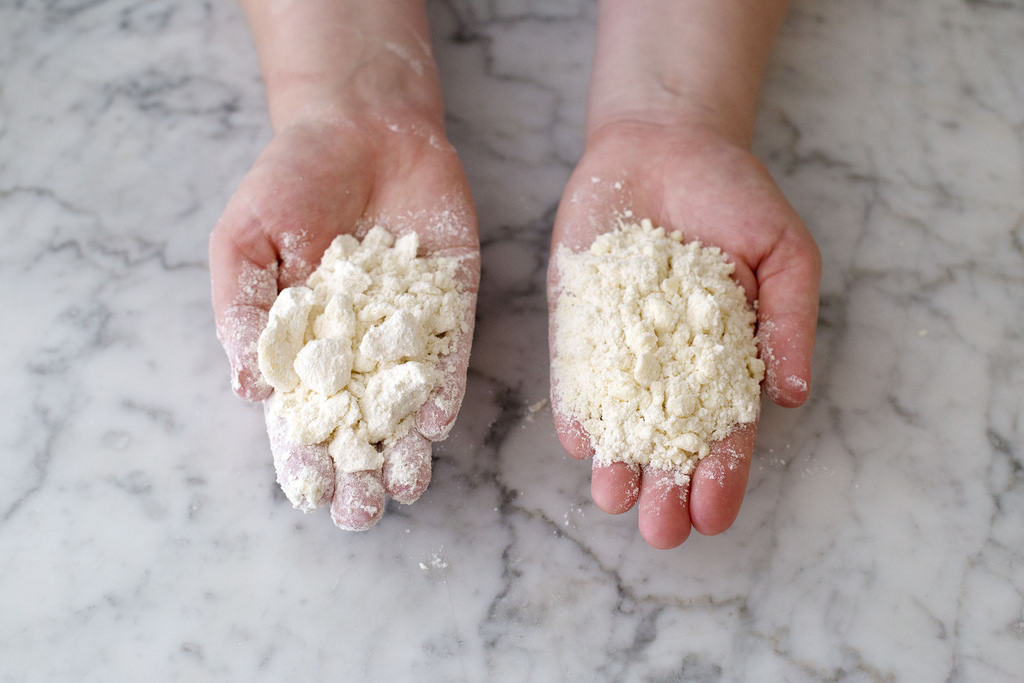
The kind of crust you want will depend on the kind of pie you’re making. If you’re looking for a flaky crust (best for fruit pies), you want large pieces of butter, the size of walnut halves. If you’re looking for a mealy crust with a shorter crumb (best for custard pies), you want small, pea-sized pieces. Here, you can see the mixture that will create a flaky crust (left), and the mixture that will create mealy crust (right).
Step 5
When you’re ready to finish your dough, make a well in the center of the flour mixture, and add ice water. I start with 3 tablespoons for a single-crust pie, and then continue adding 1 tablespoon at a time just until the dough comes together. Your dough should never be sticky — it should hold together easily but still feel almost dry to the touch.
Step 6
When you are done mixing, wrap the dough and chill it well in the refrigerator. If you’re short on time, you can chill it in the freezer for 10 to 20 minutes. If it gets too cold, just let it soften for a moment at room temperature, or beat it with your rolling pin until it becomes malleable.
Step 7
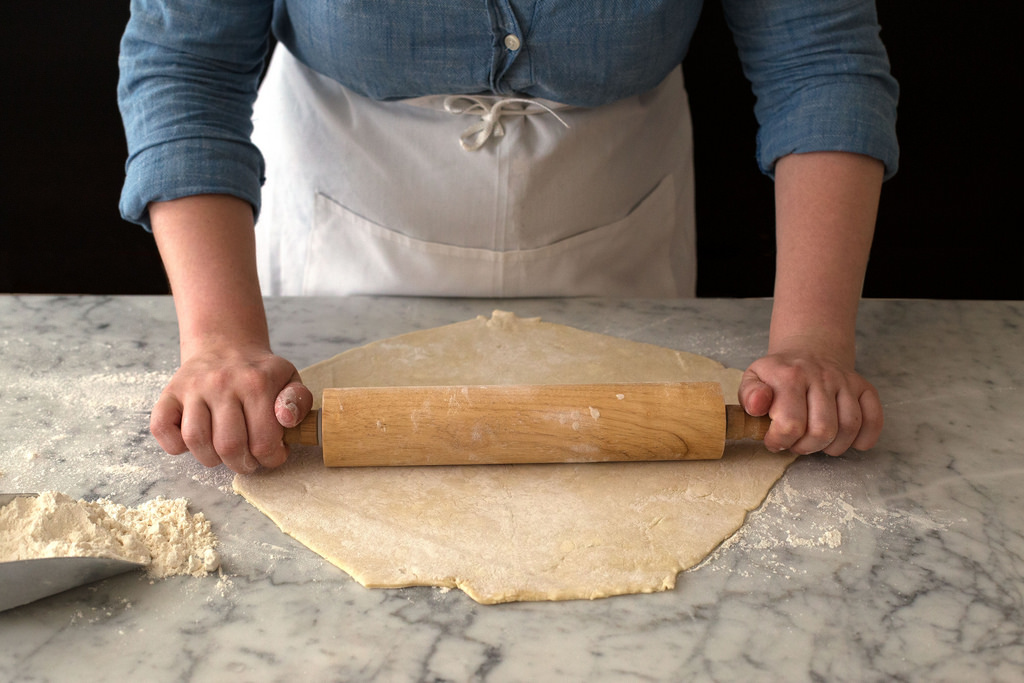
Roll out the dough on a lightly floured surface. The key is to work quickly (so the dough doesn’t heat up), using as little flour as possible; using too much can make the dough tough or overly dry. Start rolling in the center of the round and push upward with even pressure. Return to the center and repeat, this time moving downward. Continue to do this while you roll, rotating the dough occasionally and re-flouring as needed to keep it from sticking to the work surface. This technique takes a little getting used to, but it’s the best way to get an even crust. Aim for 1/8-inch thickness.
Step 8
To transfer the dough to your pie plate, roll it onto the rolling pin and then gently unfurl it into the plate. Press firmly to make sure the crust reaches all the way to the bottom of the plate, but don’t poke any holes in the dough. Trim the dough so you have a 1/2-inch overhang all the way around, and chill it for 15 to 30 minutes (or freeze it for 5).
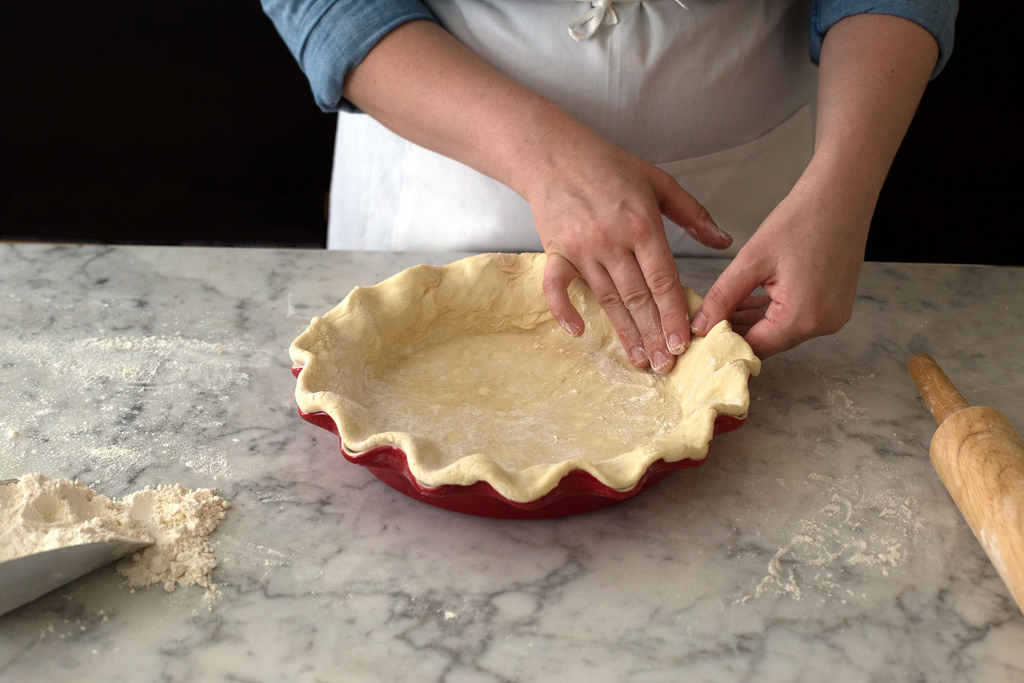
Step 9
Tuck the excess dough under at the edges, working all the way around and pressing lightly to help the dough “seal” to the outer edge of the pie plate. Return the dough to the refrigerator for 15 to 30 minutes, or to the freezer for 5 to 10 minutes before proceeding with baking or par-baking.
Step 10

This pie plate was a gift from Rose Levy Beranbaum — she designed it, and it’s called “Rose’s Perfect Pie Plate”. It’s pretty, bakes evenly (hello, crisp bottom crust!), and makes a gorgeous edge without any effort at all. I highly recommend it for pie beginners — anything you bake in it looks professional!
Strawberries and Cream Pie
Makes one 9-inch pie
For the crust:
1 1/4 cups all-purpose flour
1/4 teaspoon salt
8 tablespoons (1 stick) cold butter, cubed
3 tablespoons ice water, or more as needed
To finish the pie:
3 cups whole milk
1/2 cup heavy cream
1 vanilla bean, halved and scraped
1/2 cup granulated sugar
1/3 cup cornstarch
3 eggs
2 tablespoons butter
1 quart strawberries, hulled
See the full recipe (and save and print it) here.
This article originally appeared on Food52
More from Food52:
More Must-Reads From TIME
- The 100 Most Influential People of 2024
- Coco Gauff Is Playing for Herself Now
- Scenes From Pro-Palestinian Encampments Across U.S. Universities
- 6 Compliments That Land Every Time
- If You're Dating Right Now , You're Brave: Column
- The AI That Could Heal a Divided Internet
- Fallout Is a Brilliant Model for the Future of Video Game Adaptations
- Want Weekly Recs on What to Watch, Read, and More? Sign Up for Worth Your Time
Contact us at letters@time.com